|
|
|
Every experienced furnace and ductwork installer knows the sequence of installation. He knows what comes first, second, etc. He knows that after a cold air boot is cut in, the next follows a plenum, return duct, cold air return drop, rest of the ductwork, sheeting, heat runs and eventually venting and condensate line – right? Not necessary! In many houses in the complicated installations you must break the routine and start being creative, think out of the box! Does everyone able to foresee what’s coming their way and be on top of the situation? Doesn’t everyone with years of experience must anticipate what comes first, then second and so on? I doubt it.
The last straw that broke the camel’s back was my visit to the job-site managed by a new guy, a 47 years old fellow with 25 years of experience, doing piece-work. You may think that this kind of guy would work very efficiently, he would be like a chess player that foresees several steps ahead and would be at the top of his game – just think again! In two spots he hung a supply duct blocking the heat runs and in the third one vented a furnace before he had a chance to hang a return duct! Of course, eventually, he managed to get that job done but why would you do it a hard way?
So, on this page I will show you some instances of the right thinking that may pave the road to excellence in the hope that some of you would learn on how to work without busting your ass!
This is a free page, but I hope that after reading on this page you would buy chapters from my Ductwork Installation Guide e-book and/or some merchandise from the ad units.
|
|
  P. 1 P. 2 P. 1 P. 2
The last piece of a 16” x 8” duct in P. 1 & P. 2 above and in P. 3 below can’t go too far anyway, because it should be stopped before the stairway. The same duct size is used for another duct that coming off the plenum in P. 4 below.
  P. 3 P. 4 P. 3 P. 4
I bet that many of you would just run this duct beyond a double joist on the right (P. 3), cut both take-offs in and toss the rest of it away, because it wouldn’t be long enough for the installation in P. 4.
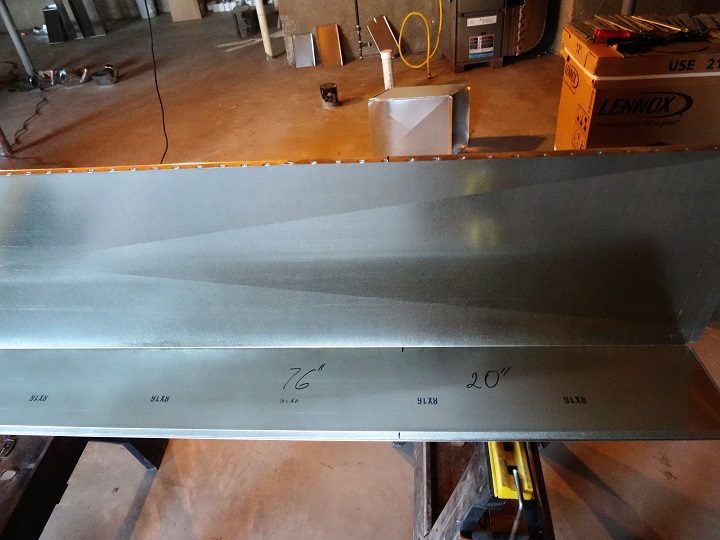 P. 5 P. 5
Instead of making extra cuts, wasting materials and time I measured the distance between a canvas and a riser (P. 4), made sure if the rest of the duct is long enough for the installation in P. 1 through P. 3 and as you can see in P. 5 handily used both pieces.
|
|
41. Supply Ductwork Installation* – the chapter deals with the take-offs installation. It is explains how to make  measurement, cut in and tap in a take-off. The Chapter describes all possible cases of the take-offs and supply ductwork installations. measurement, cut in and tap in a take-off. The Chapter describes all possible cases of the take-offs and supply ductwork installations.
The chapter has 31 pictures; 16 pages*. $2.37 (Instant Access).
On 05/09/2015 text of this chapter was significantly modified and improved On 06/18/2015 four more pictures were added. |
|
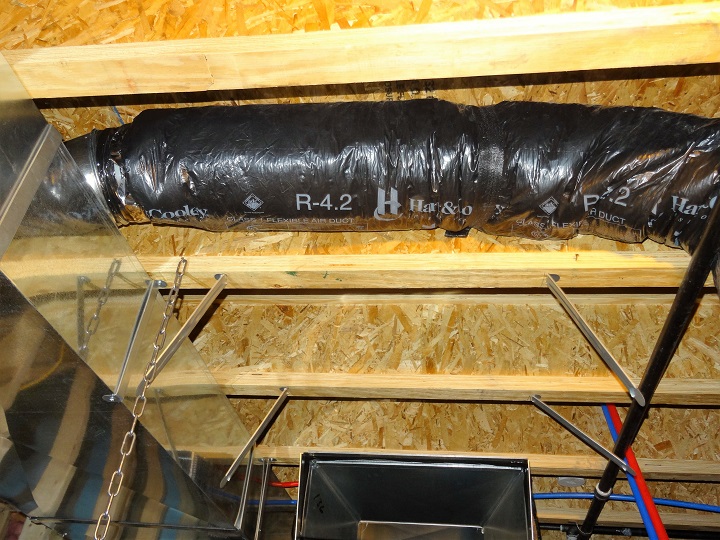 
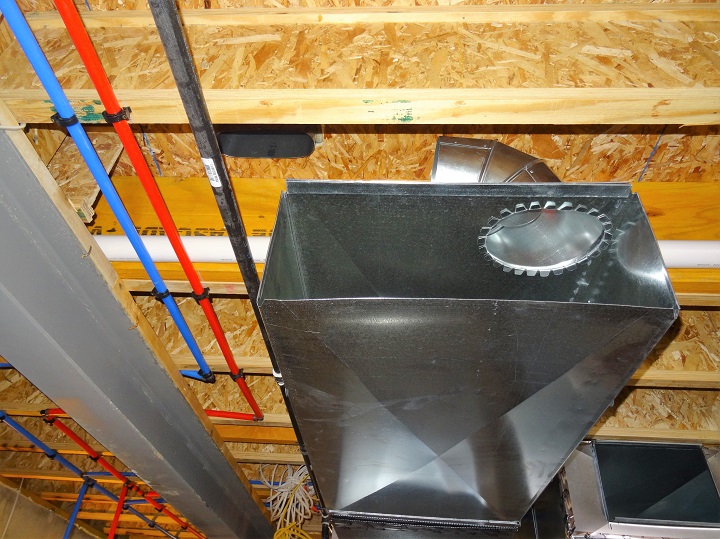
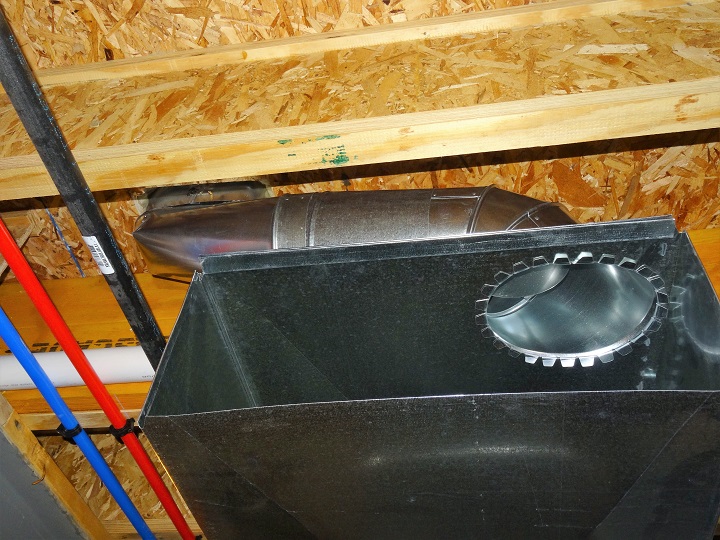
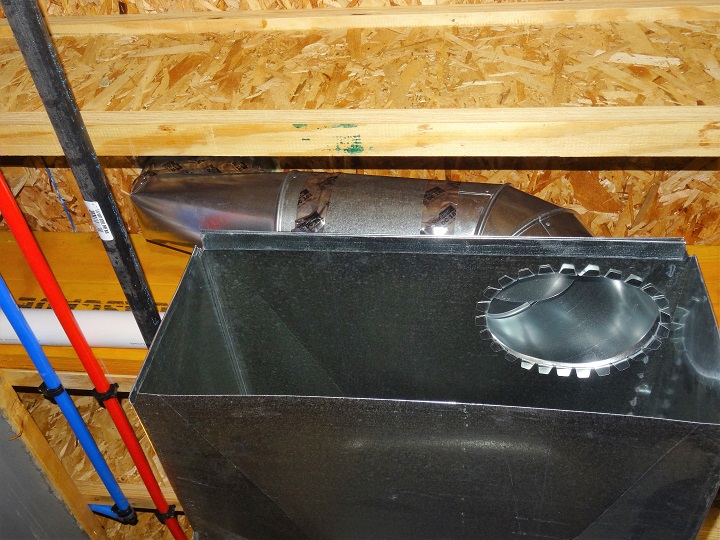
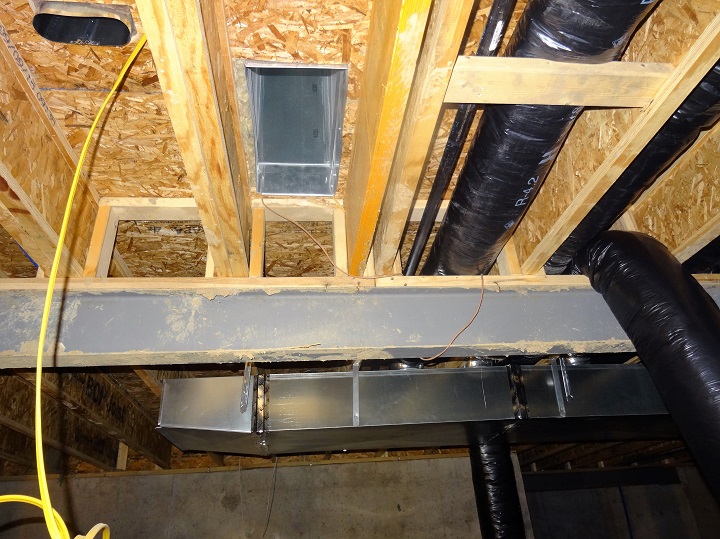
This 7” flex is intended for a basement cold air return in one of the Pulte houses.
The distance between the ducts is 6”, but because an air return doesn’t require use of a damper no 7” sheet metal sleeve needed for this installation. Of course in order to connect flex to a take-off you can use it anyway, but why? Just make a connection before the supply duct is hung and save on the extra work.
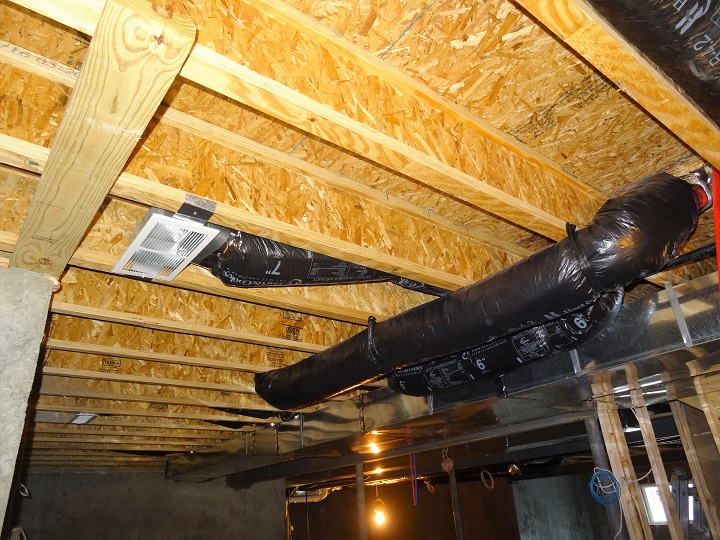
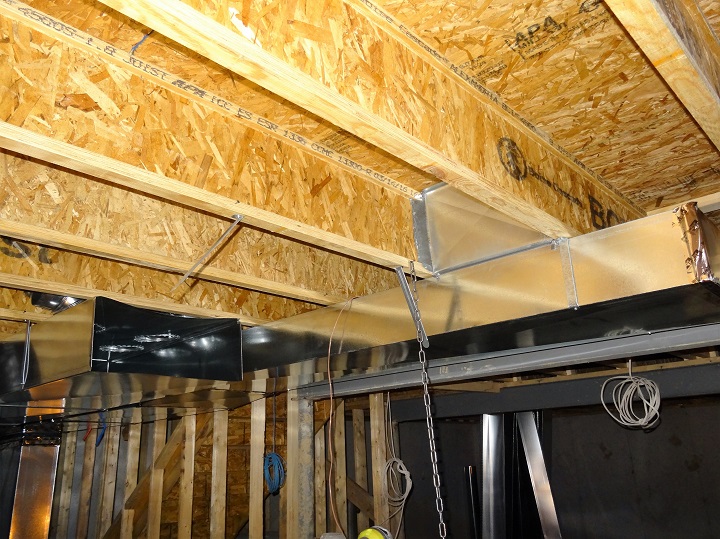
This is how that cold air return looks like after the installation is complete.
|
|
40. Cold Air Return Duct Installation#– the chapter covers a wide variety of the different aspects of work that is  necessary to know in order to be able to install the cold air return duct, such as: how to take measurements and how to cut in a canvas, how to put together a duct, fold drives, and nail hangers. The chapter explains how to hang a duct if you are working alone or with a helper, how to install a cold air drop etc. In addition, there is a description on how to take a measurement and cut a piece of duct. Furthermore, the chapter explains how to make measurements and cut openings for cold air returns in the duct, and describes three ways on how to connect two ducts together. In the end, the chapter represents a few uncommon cases of the cold air duct installation. necessary to know in order to be able to install the cold air return duct, such as: how to take measurements and how to cut in a canvas, how to put together a duct, fold drives, and nail hangers. The chapter explains how to hang a duct if you are working alone or with a helper, how to install a cold air drop etc. In addition, there is a description on how to take a measurement and cut a piece of duct. Furthermore, the chapter explains how to make measurements and cut openings for cold air returns in the duct, and describes three ways on how to connect two ducts together. In the end, the chapter represents a few uncommon cases of the cold air duct installation.
The chapter has 134 pictures; 78 pages*, $3.50 (Instant Access).
#From the UMC 2000 aka CMC.
On 03/31/2015 text of this chapter was significantly modified and improved. On 04/03/2016 five more pictures were added. |
|
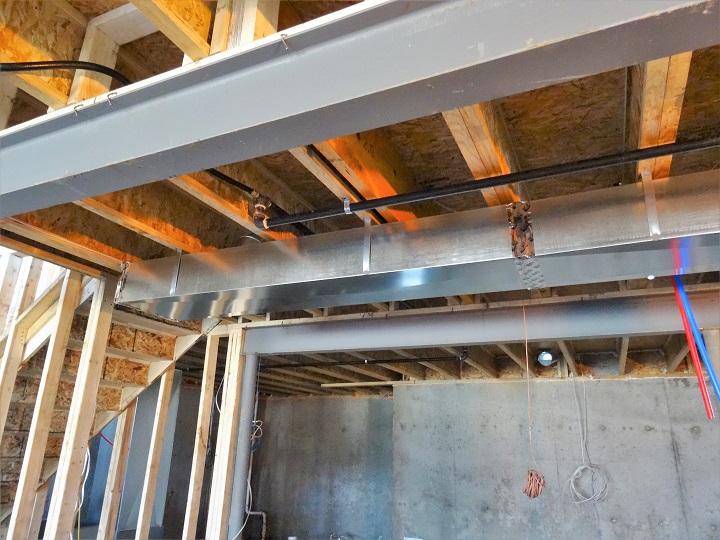
I have no doubts that many of my co-workers would leave this heat run alone. However as you can see it for yourself this is much easier to join some parts before a supply duct is hung in place.
 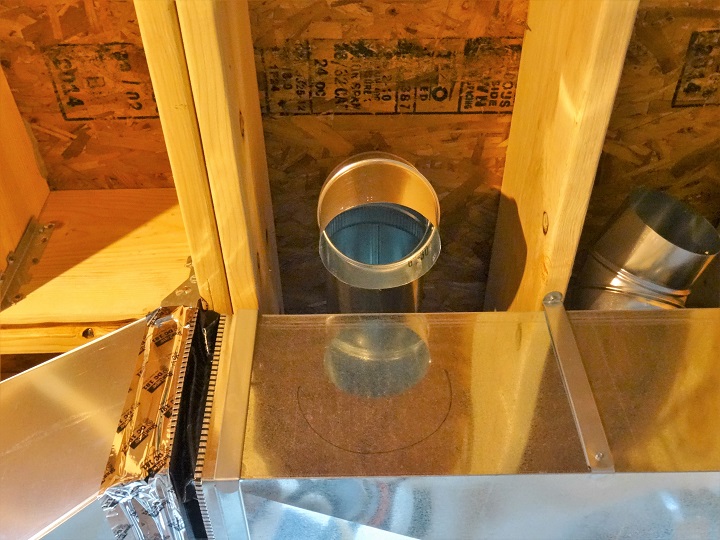
Next you can hang a supply duct and find location of the take-off.
Cut out an opening in the duct and install a take-off with a damper.
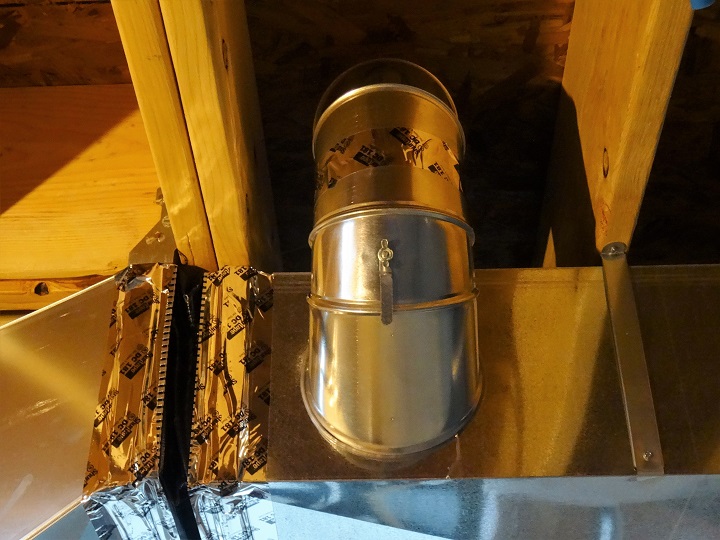
And effortlessly finalize installation!
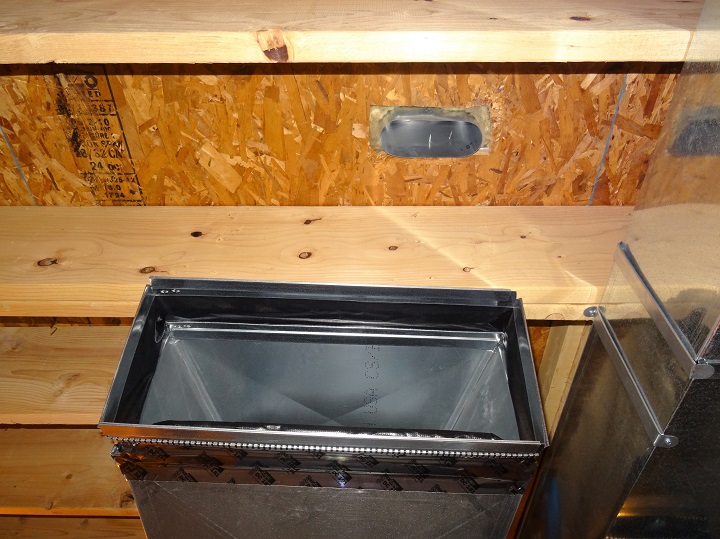
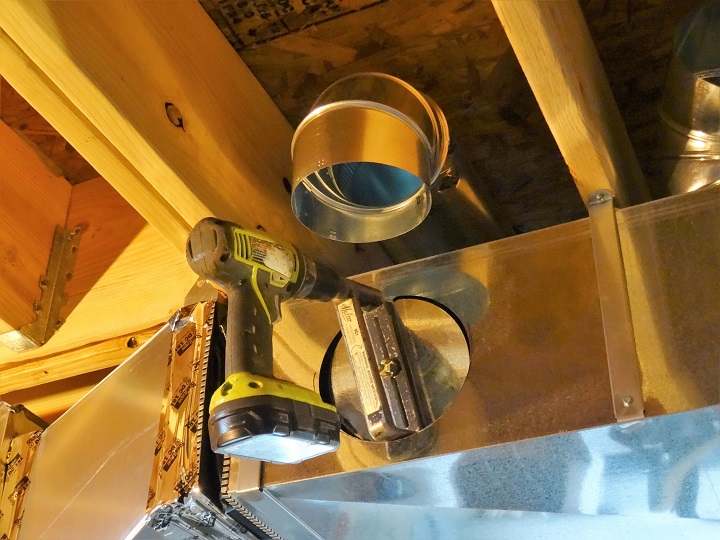
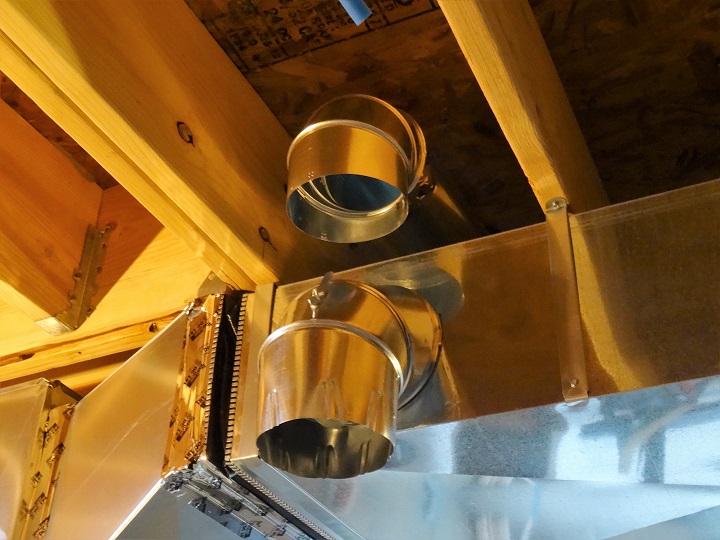
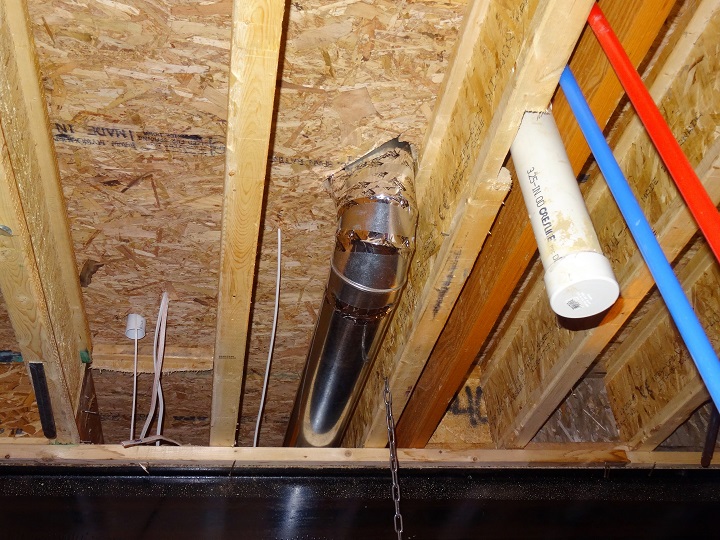
In the almost similar situation I made a heat run ahead of installing the ductwork.
In this case I couldn’t tap a take-off to the side because the distance between the ducts is 7”, but 7” take-off is 8 ½” tall.
And I couldn’t insert a piece of pipe with fitting because plumbers ran their pipes before me.
|
|
43. Installation of Heat Runs – the chapter covers the heat runs installation in the basement and deals only with all 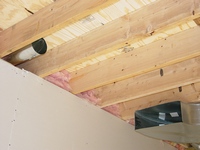 possible cases of the “straight shot”. possible cases of the “straight shot”.
The chapter has 129 picture; 71 pages*. $3.41 (Instant Access).
On 04/22/2015 text of this chapter was significantly modified and improved. 7 photos were added. Examples of Pulte Homes ductwork installation were also added to this chapter. On 04/20/2016 one more puicture was added. |
|
  P. 1 P. 2 P. 1 P. 2
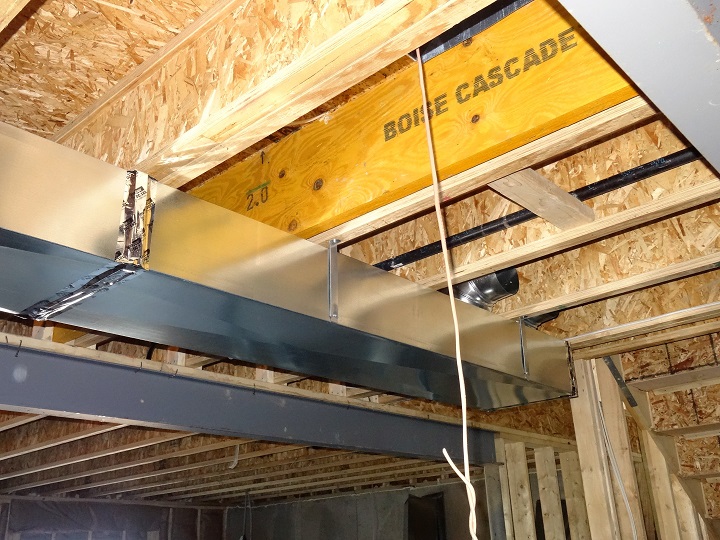
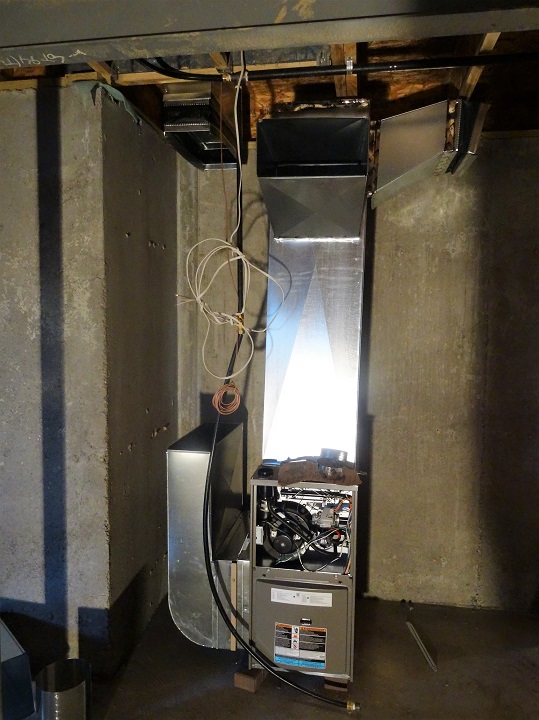
The installer who was installing the furnace in P. 1 has 29 years of experience! Does it help him – obviously not. But what is actually wrong in this picture? Well, the furnace sits right in the corner and with plenum on top of it, it becomes very difficult to make all the drive-clit connections and tape the joints. Especially this is difficult to do for the top one, because it should be done while hanging on the ladder.
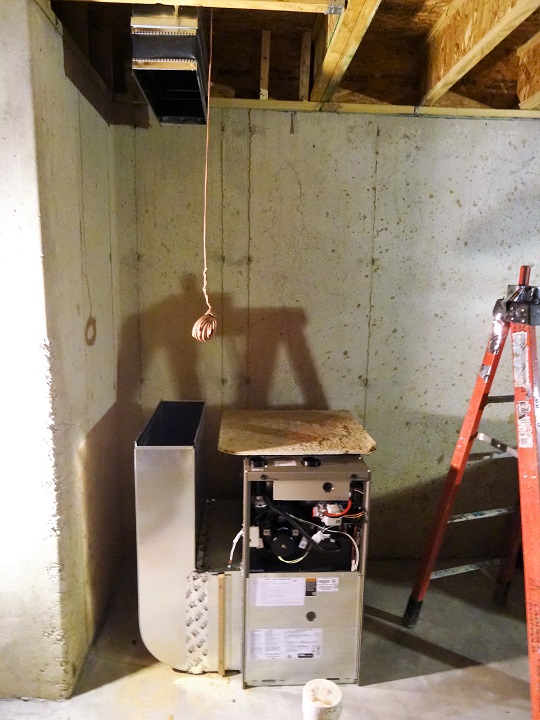
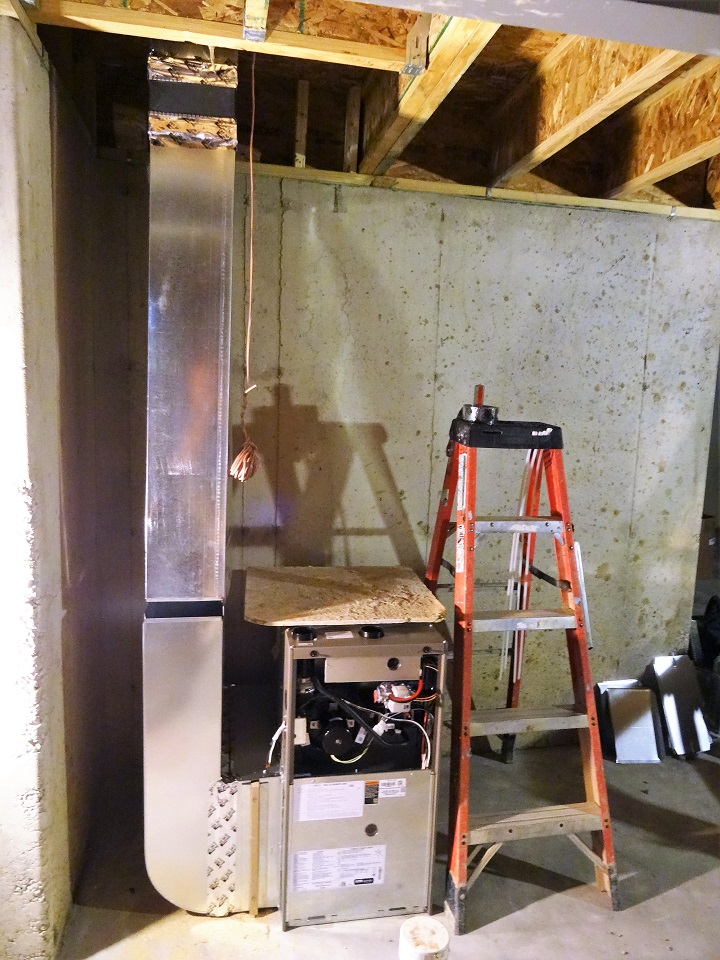
The right way of doing that you can see in P. 2 & P. 3:
After a cold air drop is connected at the top you can install the plenum, set furnace on bricks and make connection at the bottom.
P. 3
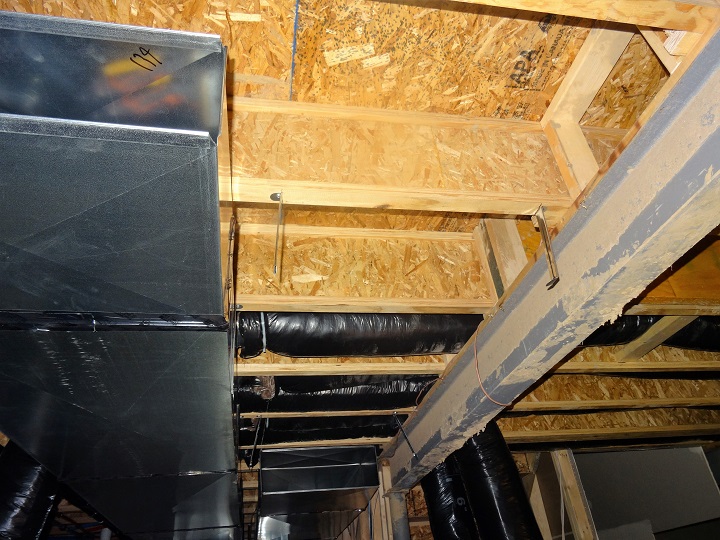  P. 4 P. 5 P. 4 P. 5
The same house, but another furnace:
Why this “pro” hung a supply duct first and a return duct second is just beyond my understanding of the sequence of installations! And the funniest part was to watch how he was trying to fit 18” wide blocker into 21” joist cavity. This is just another problem with guys like this one – they make a shortages list as they go?!?
In P. 6 you can see the right way of doing the same type of installation.
P. 6
|
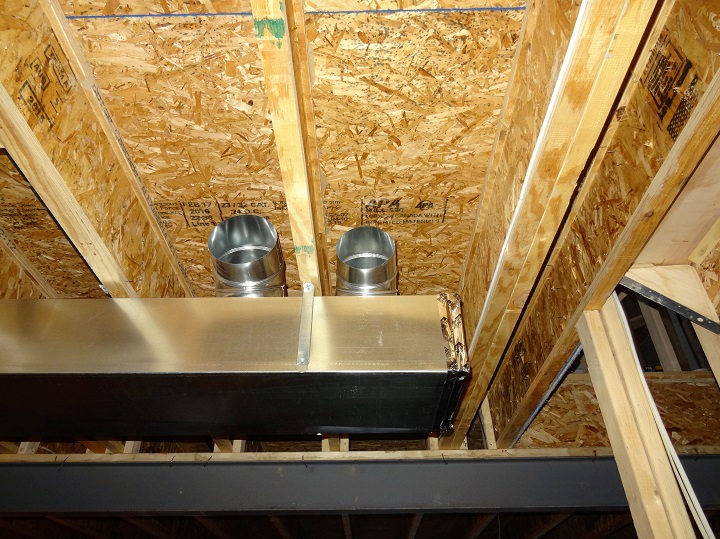
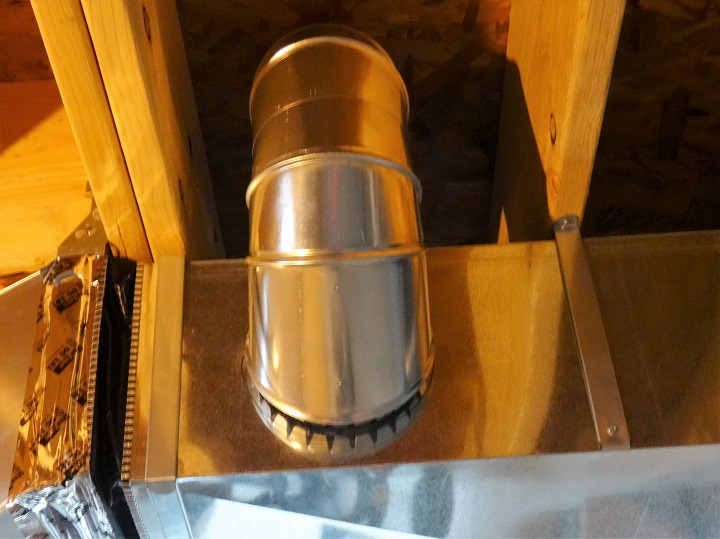
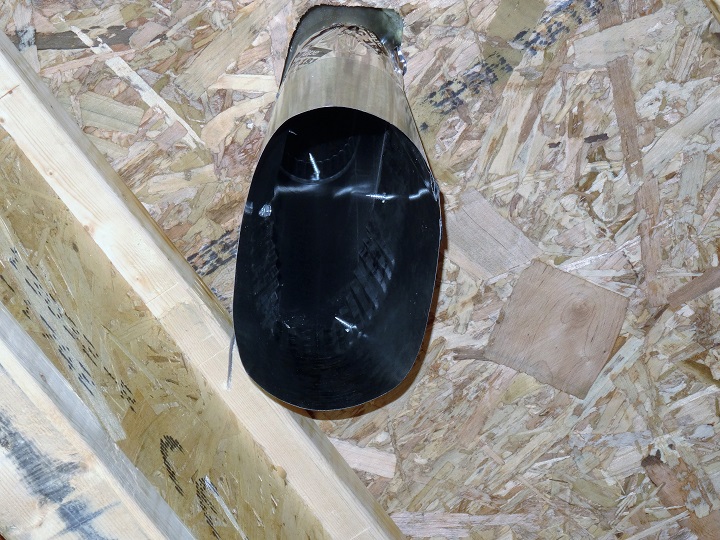
| Sometimes an oval stack can be disposed at forty five degree angle and then you don’t have a fitting for connection to the pipes. The best solution here could be a “jumper”, but in the case that you can see in P.1 it just wasn’t an option.
  P. 1 P. 2 P. 1 P. 2
So instead of any other fitting you can use a round elbow, just like if it would be a “jumper”, but then the distance between an elbow and an oval stack becomes very short and a piece of pipe becomes very curled (P. 2) and hence significantly reduces the airflow!
 P. 3 P. 3
And if you easily can fix it from one side by driving a screw (P. 3), the other one that is facing a joist out of reach by any tool. Is it true? Of course not, but I bet that most of my colleagues just would leave it alone!
 P. 4 P. 4
So the solution is very simple - you may drive a screw from the inside out, and as you can see it works very well (P. 4).
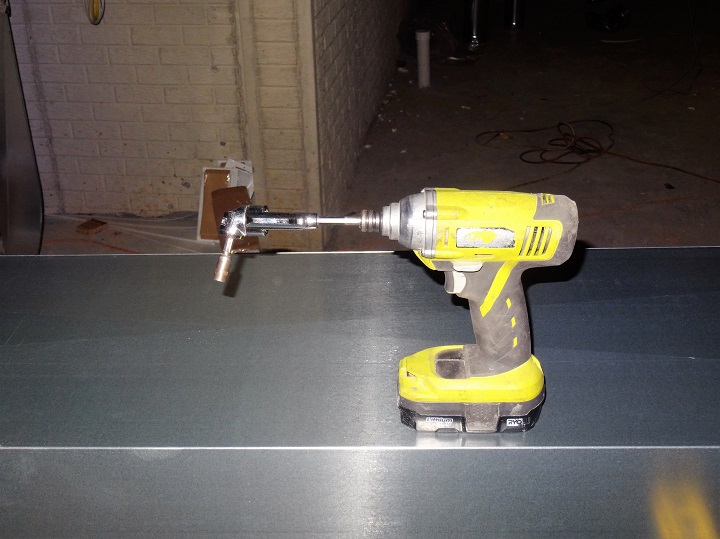  P. 5 P. 6 P. 5 P. 6
And the magic tool I used in this case is the angle driver.
In P. 6 you can see how this installation is looks like when complete.
|
|
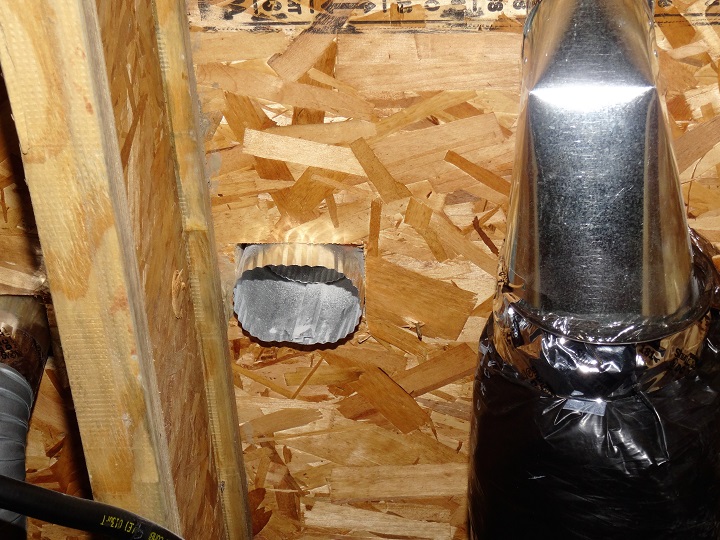
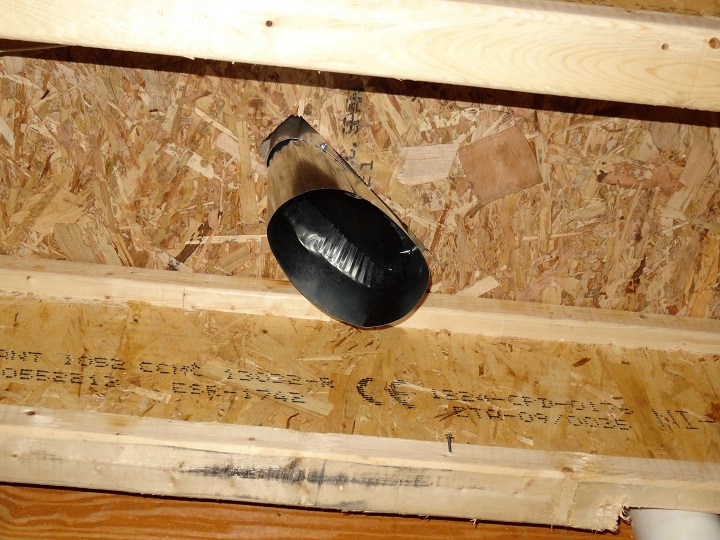
The 4” pipe in the picture above is a dryer vent. An installer made an extension that is way too short and because of that it’s very difficult to tape the connection (as you remember no screws are allowed). In this installation this vent should be run as a “jumper”, meaning that the pipe, at first, jumps under the joist on the left and then jumps back up into a lookout. An installer knew that, because he installed a dryer cap in the band joist, but made the extension piece too short anyway! What’s wrong with this guy?
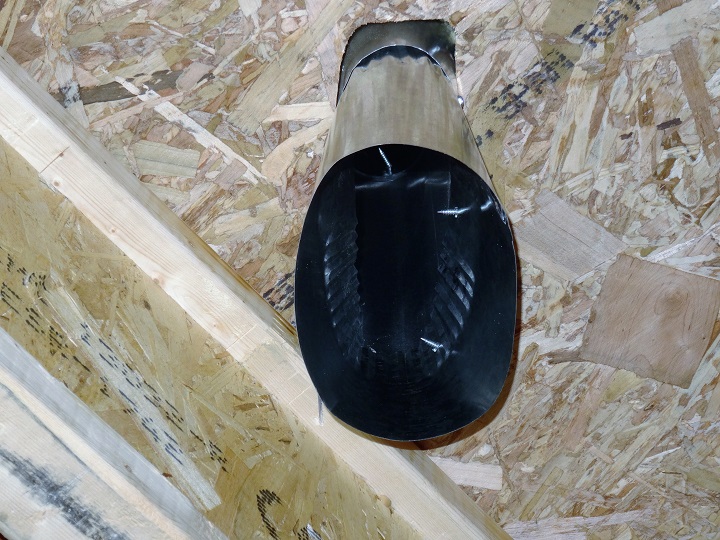
The problem here is a very common among all ductwork installers – they are afraid to calculate! What a smart installer would do in situation like this? OK, let’s say the distance between 4” elbow and the floor is 3”. The thickness of the floor is ¾” and joists are 12” wide. Then:
3” + ¾” + 12” = 15 ¾” – that’s it! Was it difficult to calculate? You decide. |
|
|
A website "ductworkinstallation. com" focus on providing information and services related to the installation of ductwork systems , which are the tubes used to distribute heated or cooled air throughout a building as part of an HVAC system; essentially, it would be a platform for individuals or companies specializing in designing and installing ductwork for homes and commercial properties, offering details on the process, and potential contractors to contact for such services.
Key points about ductwork installation websites:
Services offered:
New ductwork installation, ductwork repair, duct cleaning, duct sealing, airflow balancing.
Target audience:
Homeowners looking to install a new HVAC system, individuals experiencing issues with their existing ductwork, commercial property owners needing ductwork for large buildings.
Information provided:
Explanations on different types of duct materials, design considerations for optimal airflow, potential benefits of proper ductwork installation.
|
|