|
90 degree takeoffs on furnace ductwork.
You can get a lot of info on their installation in Chapter #41 of my DIGuide book .
A/C cold air return should be in basement.
This statement is false.
Adding air conditioning duct, where to find ductwork books?
Here on this site.
Air return on foundation wall.
You can find info for this topic on this page.
All about duct work.
You can learn it all on this page.
Are cold air returns installed in each finished room in the basement?
Yes, except a bathroom, kitchen and closets.
Are you required to have a return in an unfinished basement?
No.
Attaching ductwork to heating and air conditioner.
You can learn how to do it in this part of my DIGuide book.
Basic hand tool list for duct work installers.
You can see this list on this and on the following pages.
Best how-to book for hvac DIY.
You can purchase it on this page.
Best way to bring cold air from basement to top floor.
Learn how to do it in this part of my DIGuide book.
Books on do it yourself how to do ductwork for central air.
Ductwork Installation Guide book.
Can I see pictures of galvanized sheet metal duct?
Yes, all around this site.
Can I wrap my supply and return ducts together?
Yes. Learn how to do it right way in Chapter #55 of my DIGuide book.
Can you bury a B-vent gas pipe in the wall?
Yes.
Can you install heating ducts in floor joists?
Yes, get more info for this topic in Chapter #55 of my DIGuide book.
Can you make a piece of duct with only one Pittsburgh Seam?
Yes.
Can you pull combustion air from a garage?
No.
Can you put a cold air return in furnace room?
Technically you can, but why?
Can you run a heating vent in a cold air return?
Yes. Learn how to do it in Chapters #45 & 62 of my DIGuide book.
Closing cold intakes in your basement can it help cool faster?
Yes, it might.
DIY heating ductwork installation.
You can get my DIGuide book for this purpose.
DIY forced air heating system installation.
You can my DIGuide book for this purpose.
Do I need cold air returns on first and second floor?
Yes.
Do registers have to be on both sides of spiral duct?
It depends on the layout.
Do your own ductwork.
You can my DIGuidebook for this purpose.
Does blow-in insulation have to cover ductwork in attic?
It should be done in the low humidity climate.
Does it help the air flow to close vents for air conditioning?
To a certain degree it does. Learn how to do it right and save on this page.
Duct installation for gas furnace.
Buy my DIGuide and learn it all.
Duct installer course.
Ductwork Installation Guide book.
Ductwork books for pros.
Ductwork Installation Guide book.
Ductwork installer training.
Ductwork Installation Guide book.
Ductwork installation techniques.
Ductwork Installation Guide book.
Ductwork intake in every room.
Learn how to do it in this part of my DIGuide book.
Ductwork register boxes.
Learn how to install them in this part of my DIGuide book.
Fan and ductwork installation guide.
Learn about bath fan installation in Chapters #23,24 & 25 of my DIGuide book.
Furnace ductwork DIY.
Buy my DIGuide book and learn it all.
Home inspection question: does duct piping for central hvac in basement garage a safety issue?
It might if it isn’t done properly.
How best locate furnace in basement?
Learn how to do it in Chapter #37 of my DIGuide book.
How furnace condensate trap works?
Learn how it works in Chapter #50 of my DIGuide book.
How to attach ac duct work to vent?
Learn how to do it in Chapter #10 of my DIGuide book.
How to change duct work in basement?
The entire Basement part of my DIGuide could be useful for this matter.
How to connect round duct work?
Learn how to do it in Chapters #43 & 44 of my DIGuide book.
How to extend HVAC ductwork?
Learn how to do it on this page.
How to hook up ductwork?
I have several chapters dedicated to this topic. Pick some of them up on this page.
How to install a heating duct in a wall cavity?
I have several chapters dedicated to this topic. Pick some of them up on this page.
How to install an exhaust duct?
Learn how to do it in Chapters #29 & 49 of my DIGuide book.
How to install ductwork yourself?
Learn how to do it in my DIGuide book.
How to install exhaust duct installation configuration?
Learn how to do it in Chapters #29 & 49 of my DIGuide book.
How to install gas furnace duct work and vents?
Learn how to do it in my DIGuide book.
How to install new ductwork?
Learn how to do it in my DIGuide book.
How to install return for furnace?
Learn how to do it in Chapter #40 of my DIGuide book.
How to install round ductwork with crimp fittings?
Learn how to do it in my DIGuide book.
How to measure basement for ducts?
Learn how to do it in Chapter #33 of my DIGuide book.
How to place of cold air returns for furnace?
Learn how to do it in Chapter #40 of my DIGuide book.
How to relocate furnace?
For this matter you may need to purchase the Basement part of my DIGuide book.
How to replace a section of A/C duct in wall?
For this matter you may need to find an appropriate chapter the Rough-in part of my DIGuide book.
How to rough in a return air vent, tap into existing round duct?
For this matter you may need to find appropriate chapters the Rough-in and Basement parts of my DIGuide book.
How to run ductwork in an attic?
Learn how to do it on this page.
How to run exhaust vents?
Learn about bath fan installation in Chapters #23, 24 & 25 of my DIGuide book.
How to use sheet metal duct fittings?
The answers to each and every one of the questions are scattered through the pages of my DIGuide book.
Duct installation photos.
Well, you can purchase my DIGuide book and get all 1217 of them.
I am looking to purchase a Multi-Split Heat Pump system. What's the best out there?
Mitsubishi.
I just got my ducts changed in my attic now some of my vents are not blowing air.
Check out the dampers they could be closed.
If I close down my butterfly ac vent will it whistle?
Yes, it might.
Install duct work from furnace.
For this matter you may need to purchase the Basement part of my DIGuide book.
Installing ductwork in attic.
Learn how to do it on this page.
Installing ductwork yourself.
That is what my DIGuide book is all about…
Instructions for building a transition on top of furnace.
Learn how to do it on this page.
Insulated combustion air intake vent.
Learn how to run a combustion air intake on this page.
Is it OK mixing equipment brands?
If the sizing of the two units is properly determined there is not an issue with different manufacturers.
Joist panning photos.
For this matter you may need to purchase Chapters #34, 35 & 36 of the Basement part of my DIGuide book.
List of hvac ducting installation tools.
Get it on this page.
Move ducts for remodel.
For this matter you may need to find appropriate chapters in the Rough-in and Basement parts of my DIGuide book.
Moving hvac ductwork in your house.
For this matter you may need to find appropriate chapters in the Rough-in and Basement parts of my DIGuide book.
New construction bath exhaust fan installation.
Learn about bath fan installation in Chapters #23,24 & 25 of my DIGuide book.
Opening a Pittsburgh seam.
You can use a flat tip screwdriver, but at first screw one duct side to the wood and try to pull it out.
Pics of installed duct work residential.
You can purchase my DIGuide book and get all 1217 of them.
Pictures of how an HVAC should look when installed in an attic.
See them on this page.
Replacing damaged sheet metal duct work.
For this matter you may need to find appropriate chapters in the Basement part of my DIGuide book.
Run duct to attic.
Learn how to do it in Chapter #55 of my DIGuide book.
Should a draft inducer downstream of my furnace and water heater run for both appliances?
If it’s for a horizontal venting, then yes.
Should my furnace plenum be the same size as the furnace opening?
Yes.
Step by step ducting learning.
For this matter you need to purchase my DIGuide book.
Venting a gas furnace.
Learn how to do it in Chapters #29 & 49 of my DIGuide book.
What is proper duct installation?
Installation performed under guidelines of my DIGuide book.
What materials can be used to make a cold air return?
Sheet metal, Thermo pan or Thermo ply.
Where to find HVAC installation guide with pictures?
Right here on this site.
Why shouldn't I use flex duct for microwave?
You can use rigid aluminum flex.
Would closing some ceiling vent create too much back pressure.
Yes, it might. Learn how to avoid it on this page. |
|
|
Communication Page
From time to time I’m opening and closing pages like this one where I’m criticizing a "Forum" and the other websites. Would be or could be my customers asking questions out there and after receiving vague or stupid answers quitting and enjoying them, because it was for free anyway!
You may ask: Why should I waste my precious 3 minutes on your website if I can come back on Google or Yahoo and continue my search? The answer is simple:
Because you are done! You can’t find anything else on the web, its over!
Of course you don’t trust me, but let’s take a look what people like you have achieved on the web for free:
Question: brhino14
 What is the rule of thumb for how many take offs can you have on a 14" trunk line? Also, how about a 12" trunk line? What is the rule of thumb for how many take offs can you have on a 14" trunk line? Also, how about a 12" trunk line?Thank You
52 minumum.
Theres no such thing as a rule of thumb.
Call a professional. This is not a DIY site.
 I fully support the military and the War on Terrorism. I fully support the military and the War on Terrorism.You can't talk about it if you haven't been there.
Instead of just simply answering the question, this guy keep fighting the terror, but already here on our ground! – 52 bullets in your a..s, m…r!!  it hurts? But never mind that, it’s just a “friendly fire”! it hurts? But never mind that, it’s just a “friendly fire”!
Of course Brhino 14 is not happy with such an answer, so he keep pushing:
Question. brhino14
I did call a professional but I am seeing how many more 8" lines can be installed on this trunk line since the "professionals" sized one of my rooms to small. I have adequate velocity just not enough volume. I am calling them back out here to fix it but I wanted a second opinion. I do not want to starve the other lines with this change. How many 8" lines, 6" lines, etc can be installed on this 14" or 12" trunk line? That is the question.
6-6" to 12" x 8"
8-6" to 14" x 8"
 It’s me, but of course I’m stupid! I should of told him to use Manual D, or J, or screw himself! It’s me, but of course I’m stupid! I should of told him to use Manual D, or J, or screw himself!
Answer. deejoe:
 Brhino14. "stick" the rule of thumb, they don't work. Brhino14. "stick" the rule of thumb, they don't work.
note;
a 14" diameter pipe has an area of approx 154 "
a 12" diameter = 112"
a 6 " diameter = 28"
a 5" diameter = 20"
You should be able to do the rest of this grade 5 math by way of "division"
Brhino14:
I thought it was that easy. I did not know if there was some "fudge factor" in the calculations. Thanks to all who have been helpful.
You saw it and understand now why Brhino14 was enjoying the answer. Don’t get it? OK I’ll explain:
 According to that 5th grader “deejoe” 12” duct can handle only four 6” heat runs but it’s not true. The speed of the airflow in a 12” duct is much higher than in a 6” pipe and that's why a 12” duct can handle more 6” heat runs than fifth grade geometry champion “deejoe” can imagine! But Brhino14 is enjoying the answer because it was free of charge! According to that 5th grader “deejoe” 12” duct can handle only four 6” heat runs but it’s not true. The speed of the airflow in a 12” duct is much higher than in a 6” pipe and that's why a 12” duct can handle more 6” heat runs than fifth grade geometry champion “deejoe” can imagine! But Brhino14 is enjoying the answer because it was free of charge!
But, the right answer in this particular case would be to use a “ductculator”!
|
|
41. Supply Ductwork Installation* – the chapter deals with the take-offs installation. It is explains how to make  measurement, cut in and tap in a take-off. The Chapter describes all possible cases of the take-offs installation. measurement, cut in and tap in a take-off. The Chapter describes all possible cases of the take-offs installation.
The chapter has 19 pictures; 9 pages*. $2.37 (Instant Access).
*Drive Connection Trick Quiz.
Offset Calculation Quiz.
On 08/24/2013 text of this chapter was significantly modified and improved.
|
|
Here is another one:
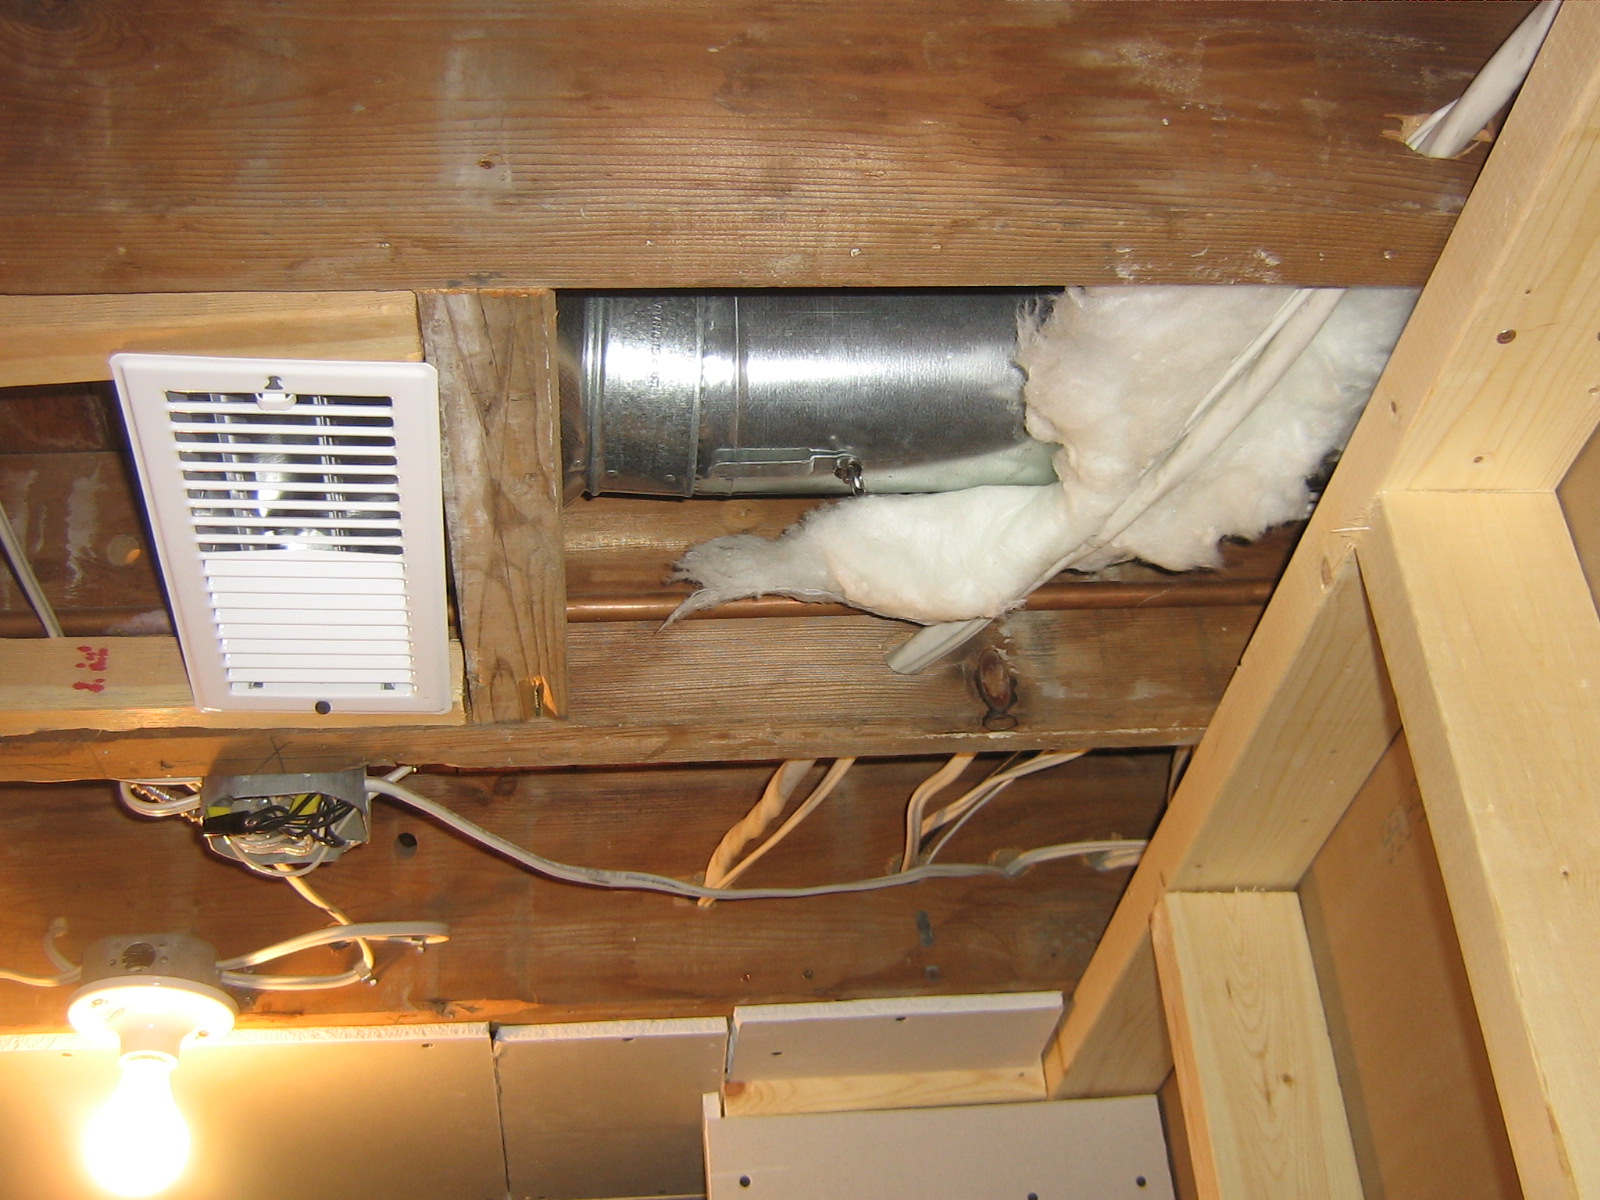
 Q. I would like to know if I can move this heat vent down the wall on the right. Q. I would like to know if I can move this heat vent down the wall on the right.
I have separated the laundry area with an interior wall and I would like to know if I can move the vent down the wall so that I can have the heat in the main part of the basement.
How would I go about doing that?
What would I need to purchase? Also, is there a vent that would be approx. 3 1/2 inches deep to fit down inbetween the stud.......
 also, where would I cut it and what piece of duct work would I need? also, where would I cut it and what piece of duct work would I need?
Thanks very much..
There are a lot of questions, they are not difficult for a professional guy if he would be paid to answer, but for free....let's see what she got:
 A. Yes you can dahling, detach the transition from the round elbow (look at the picture there no round elbow!), match the dia of the pipe, extend the run then re attach the transition and grille. A. Yes you can dahling, detach the transition from the round elbow (look at the picture there no round elbow!), match the dia of the pipe, extend the run then re attach the transition and grille.
the transition is already 3 1/2 x 10. I can hear you scratching yur pretty head; LOL a transition is the piece that transitions, IE changes from round to rectangular. You can also run 3 1/2 x 10 inside the wall down to where you want the grille the use a rectangular elbow to re attach the grille
This moron is saying: “the transition is already 3 1/2 x 10” I don’t know what he is talking about, because if he meant a 10” x 4” ninety degree boot which you can see on the picture, it's actually 10” x 4” not 10”x 3 ½”!
He doesn't explain what he meant when he said: “You can also run 3 1/2 x 10 inside the wall”
Q. Jackie dahling you are fabulous. And yes, I did scratch my head (Of course you would), but then I saw your great explanation. (This is great! Of course it's a great explanation because it’s free!!!)
So that means that I have to cut the long round tube that is there now, near the top plate, and then attach a long rectangular extension all the way down to near the bottom of the wall, (I want to put the new vent closer to the floor, maybe 12 inches from the floor?)and then attach the grill?
That means I have to buy another transition thingy, right.
I don't want to keep it in the ceiling.
Have I got it right? Probably not.
After his stupid explanations she is definitely confused, but don’t forget it’s still free, so it’s better to be polite!
A. The long round thingy (now this moron is flirting with her) will easily disconnect, (should be screws in it ), then you just need to extend the round thingy and get another roundthingy that is bent, an elbow, then get a special thingy the is round on one end and recangular on the other ( transition ), then you get rtectangular thingyies and extend that as you said until you get close to the floor and get another special bent thingy, rectangular, elbow and re attach the grille.
Well, this guy wants her to run the 10”x 3 ½” duct outside the wall, he was so preoccupied with “thingys” so he forgot about everything else!
Q. I get it! They should call those things thingies, then I will better understand.
Jackie, do I have to cut the top plate in order to put in the elbow thingy in? (Look, she is smart, but not smart enough to stop this insanity!) And then continue to follow you instructions sith rectangular thingys. Also how do I secure the rectangular things to the studs? I don't just leave it there loose, do I?
Thanks Jackie, you are wonderful. (Of course, because Jackie is doing it for free!)
A. I would avoid cutting the top plate at all costs. (Why that, he is a such moron) I believe you are finishing one side only. (But she said that there is going to be a laundry room on the other side) They make a rectangular thingy that looks like a wide "U" for gettin under a beam, (There is definitely something new for me, I never have seen anything like that in my entire life!) in this case you use it vertically and can swing under the top plate and into the stud bay, To connect either round or rectangular thingies they slip together the you use short self tapping screws and then they make a sliver tape to seal the joints. NO DUCK TAPE. (Why not, moron!) AND YES that is its original name :}:} NOT duct . As far as running thingies in the stud bay they make strapping that you can screw across the studs and then into the ducting to keep it in place and not rattling all over.
HAPPY BUNNY DAY
Q. Thanks Jackie, and a Happy Bunny Day to you too!
Thank you so much for the explanation, as I was going to start cuting the stud in order to get the rectangular thingy down between the studs.
Thanks for telling me about the large U shape thingy to go around the top plate. Makes my job MUCH easier.
When I'm done, I am going to show you so you can see what a wonderful teacher you are.
Thanks again so very much.
Well, I also will wait to see the monster she’ll create after explanations like these! But I’m still waiting!
|
|
This exchange just recently took place on another "DIY Forum" website. The story is very long, so I decided to skip most of it, but if in a few words: a guy wanted to save money by doing a unit and ductwork installation by himself. He tried to find the necessary information, but even on this sort of forum he just hit the wall. After several attempts he, by the way like most of you who are trying to find answers for theses kinds of questions, just gave up. But if most of you are walking away silently instead he made a speech:
Greg - maybe you took my last post the wrong way - I said I see your points. My position is this...as far as DIY, I do general construction to finish work, I work on my own cars, I work on my own bikes, I build motors, I build drag bikes, I frame up restorations on motorcycles, all in my spare time away from my full time job and volunteer work for animal rescue and abuse. I'm mechanically inclined and not afraid to take on any job so I thought I would do this job as well. My closed door comment was in reference to any other field I have ever dealt with - and serviced - there seems to be a different approach. People seemed to want to help and offered advice - just as I have done in forums I participate in. While you and the others here have been decent and professional, as a whole nobody is willing to help. While browsing through other HVAC forums I saw outright verbal attacks on people like me who not knowing what is involved, start off wanting to do the work themselves and save money, and then go to what appears to be a good resource. This is on first time posts asking innocent questions. These two other HVAC forums, people asked about DIY AC and were answered with, "why don't you buy some eggs, go to a diner and ask the chef to cook them for you and see how far you get"....and..."show up at a car dealer with a battery, radio and fan belts and ask for a car minus those items"...and..."I love people like you who think you can do anything and then I get to come to your house and charge top dollar to fix your f*ck-ups". It's just baffling.
This being a DIY forum and having all of what I felt is good information for the job I'm looking at, I thought I'd give it a go. The analysis was done. I have a detailed Heat Gain/Heat Loss report. I have a CFM by room report. I have detailed diagrams of my attic and main floor with square footage, floor measurements and window locations. I have the right sized equipment for the job. I understand any kind of math you could throw at me. I understood then and now that working with refrigeration sealed systems is regulated work requiring special training and certified people to do specific tasks and have someone who is willing to do these parts as a favor...so...I *thought* I'd bone up on what is needed to do the duct layout and move forward with the job. So my closed door comment...all of the above combined fed into that.
I was not being sarcastic when I said I guess I'm going to hire someone. I'm smart enough to not beat my head against the wall trying to do something blindly when dealing with thousands of dollars...but I am going to help where I can and I'm going to learn why what is done along the way so I know what is installed in my house, how it works and why.
One of the "experts", who is wasting his time on this particular website, gave him an answer he disserved:
It reads as if you have done your homework on this project, most people looking to save a buck on a DIY install don't and then wonder why their system isn't perfect.
As you have found out there is a fair amount of engineering work that needs to be done for a properly functioning system and I'll go on record stating that properly engineered and installed residential systems are a rarity these days.
As with every other trade the HVAC industry is quite competitive. Few residential installation companies have an engineer in house and so they rely on computer programs and rules of thumb to make their designs. These computer programs run the gamut from very good to just mediocre.
Since the industry IS competitive the contractors generally shave the corners pretty tightly and far too often install ductwork that is barely adequate in size and this (along with other cost considerations) has forced manufacturers to design their equipment (furnaces and air handlers) to function in worst case scenarios. Return air ducts are almost always inadequate for the job and noise is rarely a consideration when designing the duct systems and blowers.
The result is a system that is noisy and less efficient than it could be.
It has been to protect them selves from the typical DIY-er that manufacturers have instituted the requirement of professional installation to have a valid warranty. While the equipment IS rugged enough to muddle through with less-than-ideal installation it cannot be expected to work when someone tries to install a 120,000 BTU furnace in their home using only a six inch duct off the discharge plenum and then taking several 5 inch branches off this original 6 inch to feed the various rooms.
Nor can the equipment perform properly (or last) when the return air is made with a single 8 inch duct and no filter. There are tests that should be made at the time of installation (but are often not) to be sure of proper temperature rise across the furnace's heat exchanger(s) and various combustion tests. DIY-ers seldom have the tools or test equipment to do these tests.
Other boards may have a preponderance of heating contractors responding to questions and unfortunately many of these "professionals" (with unprofessional attitudes) look upon DIY-ers as stealing food from the mouths of their families.
Then, of course, there are the many government regulations in this industry that range from energy conservation to fire codes and refrigerant handling certifications that few DIY-ers either know, understand or in some cases even care about.
So yeah, it IS a closed industry, but for many, many reasons.
So, of course you can try to submit your questions on these kinds of websites. But don’t forget that for free question you may get free of sense answer!
Here are more questions and answers from diychatroom.com websit:
 santech2 santech2How to Add HVAC Vent I do not have vents to cool or heat my basement, what is the easy way to do it? Where to put return or supply vent. I read somewhere that just to put a return in existing return duct. I have existing supply line cut for humidifier was wondering if I can just put flexible duct with the matching hole in dry wall. Will that work? Please advice.
TazinCR
Is your A/C unit large enough to take on the extra capacity?
Mister TazinCR obviously doesn’t know that when someone is even doing a load calculation he/she is counting the basement too. But it doesn’t make too much sense anyway, because in the worst case scenario a furnace will work just a little bit longer!
Furd
The "easy" way is rarely the proper way and it could seriously upset the proper performance of your entire heating system. Ideally you want to do a heat loss / heat gain calculation on at least the room to which you will be adding the ductwork to in order to properly size the ducts.
Same answer and please read my comment above. Did those guys help? I don’t think so!
The proper place to connect the supply duct is at the furnace discharge plenum or trunk duct. Be sure to install a balancing damper at the point of take off. Return air ducts should be 1-1/4 to 1-1/2 the size of the corresponding supply duct and should connect to the furnace return in a manner that allows free flow from all the returns with minimal resistance and also so that all returns are filtered before entering the blower suction chamber.
Here he’s trying to help but didn’t answer the question! By the time he got to this point he probably forgot what was a question about!
Kwtsat
Installing Cold Air Return (Basement)
Hello, in the place we bought which has a finished basement, there is not a cold air return. I want to install one. Because it is finished, the easiest way would be taping into the cold air return approx 2 feet from the furnace to run my line.
Is this acceptable? Any opinions appreciated.
Thanks
Furd
Maybe. Is the filter for the furnace located at the furnace or is it located in the return air grille? Is there a supply air plenum on the furnace with multiple supply air ducts or a single supply air trunk duct with branches?
There are more questions but please answer these first.
For some instance Furd is right: there not enough initial information to answer the question. But why is he asking about the filter location? This question doesn’t make sense because the furnace installed in the basement. He probably had it in mind that there is the attic furnace installation. Will this guy read questions or he is living in his own little world?
On this page I’ve mostly criticized guys who are wasting their time on the multiple so called "Forum" websites trying to help people “in need”- but actually they are helping the people who trying to save every single buck, people who prefer to get a stupid or meaningless answer instead of a good one, main value of which is: this answer was gotten for free!!!.
Below I decided to take a closer look at the guys who are actually looking for help: 94SupraTT already posted 10 questions on this website: hvac-talk.com and he is supposed to know that this website is not a DIY website (also useless from this point of view), but anyway he asked this question:
94SupraTT
Farthest room (mine) from A/C unit not cooling well
This has been an issue since I purchase the house however I have never really addressed it. Unfortunately it cost me last month. I've always had to lower my thermostat to cool this room. My room is noticeable warmer in the winter and cooler in the summer than the entire house. The side closest to the unit at times doesn't even need to be cooled because it is so much cooler than my room. I've been trying to educate myself online however I don't know where to start. I (believe) I understand somewhat that the room needs to circulate air (in and out) well. The room has 2 vents however I'm not sure if enough air is getting into the room. Aren't there dampers that control the amount of air going to the rooms? If so where do I locate them? I'm assuming that the rooms that are cooler could stand to have less air going to them. I have all the vents open in my home except our laundry room. Any more info needed I will be happy to supply.
I'm not sure if this matters but the previous owners built an above the garage room in the home. One of the walls of the above garage room I believe is above my bathroom.
blackbelt3677
Remember this is not a do it yourself website. We are all making a living doing this. I would suggest calling a contractor and having them do a comfort balance. This would balance the airflow proportionally to where it needs to go. And no balance a dampers are not always installed.
hvac45
The room needs more air, as stated, find a company that can balance your system, most new construction companies just put them in and walk away.
94SupraTT
What should I expect to pay to have the system balanced?
jrbenny
It varies from state to state.
Who can explain to me why this guy asked his question there on that website but didn’t ask it on mine? Why is it acceptable to be beaten to the pulp and don’t get any answer at all instead of going on my website, which by the way, almost first or at least, on the first three pages of any web search, and you can get the answer you need. I just don’t get it!
|
|
When I have found this website: www.diynetwork.com  on the web, I thought OK I’m done, definitely I’m in the wrong business because my customers would be there and take all the information for free! But when I actually started to read what that “expert” on the web, I thought OK I’m done, definitely I’m in the wrong business because my customers would be there and take all the information for free! But when I actually started to read what that “expert” suggested to do a big sigh of relive exited my lungs! suggested to do a big sigh of relive exited my lungs!
So, let’s read this hogwash together and I will make some comments as we go:
 1. The first thing you need to do is attach the takeoff to the main supply line. Mark the center point for the takeoff and drill a pilot hole using the cutting bit in the hole cutter. Preset the cutting tool to the correct diameter. Place the center guide in the pilot hole and start the cutting bit along the circumference of the hole. Use a right angle drill because you have to work in a tight space, but you can attach the cutting bit to any drill. The cutting bit then swivels around the center guide (figure E), forming a perfect circle. 1. The first thing you need to do is attach the takeoff to the main supply line. Mark the center point for the takeoff and drill a pilot hole using the cutting bit in the hole cutter. Preset the cutting tool to the correct diameter. Place the center guide in the pilot hole and start the cutting bit along the circumference of the hole. Use a right angle drill because you have to work in a tight space, but you can attach the cutting bit to any drill. The cutting bit then swivels around the center guide (figure E), forming a perfect circle.
Note: Sheet metal hole cutter and right angle drill are available at most rental centers or specialty stores.
I’m not aware if these tools are available "at most rental centers", rather not, but if it does you have to spend money on it. If not, you can buy them easily at the supply house. The cost of the hole cutter approximately $60.00 and right angle drill could be around $70.00! Congratulations with a big saving!  At this point I would suggest to hire a pro and save some money! At this point I would suggest to hire a pro and save some money! 
 Expert Tip: When doing any heating or ventilating project, you may need to pull a permit, so check with your local municipality. In some cases, you may even need to hire a pro to help with this kind of project, so check on that as well. Expert Tip: When doing any heating or ventilating project, you may need to pull a permit, so check with your local municipality. In some cases, you may even need to hire a pro to help with this kind of project, so check on that as well.
Of course you may need to pull a permit! Next expert tip will probably be that you have to pull a permit before driving a nail into the wall!
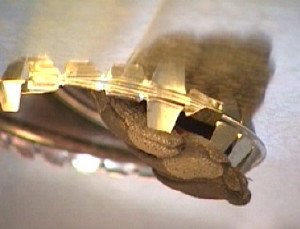 2. After the takeoff is in place, reach in and bend the tabs over (figure F) to secure it to the duct. 2. After the takeoff is in place, reach in and bend the tabs over (figure F) to secure it to the duct.
This guy actually doesn’t know the right way how to install a take-off. Someone please tell him to contact me and for a very, very small fee I’ll give him a run down!
3. Next, you need to install the ceiling register boot (figure G) so you will know how long to cut the supply duct. Center it between the joist and screw into place with self-taping screws.
Note: Use a power nut driver to drive self-tapping sheet metal screws.
 I know it’s not a big deal but I never use screws for this matter, because they are sticking out too far and interfering with the drywall! I know it’s not a big deal but I never use screws for this matter, because they are sticking out too far and interfering with the drywall!
4. Measure the length you need for the supply duct. Take the measurement from about an inch inside the takeoff to about an inch into the boot collar.
The guy is completely out of touch with reality. He doesn’t know the right way on how to make a measurement. Beside that his measurement is wrong!
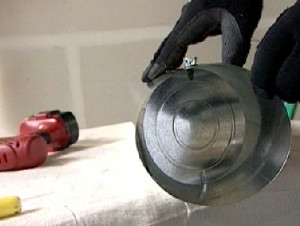
5. Cut the duct to length with a round duct cutter. You need to use a round duct cutter 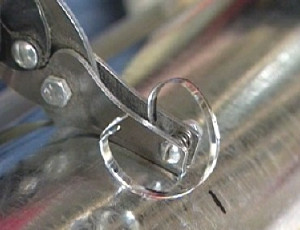 because the cutter actually removes a thin strip of metal along the cut line (figure H), which makes the cut a lot smoother. It is almost impossible to cut the metal with any other tool. because the cutter actually removes a thin strip of metal along the cut line (figure H), which makes the cut a lot smoother. It is almost impossible to cut the metal with any other tool.
This guy is awesome! This tool is actually designed to cut a duct which is already snapped together. But I never have seen that anyone in this business use this kind of tool. If this tool is not in use it’s probably very expensive, so, be ready to spend another $45, or hire a heating contractor and start saving money!
 “It is almost impossible to cut the metal with any other tool” – I don’t know where this guy comes from! Maybe he won a competition among DIY-rs on that website, or maybe he just a boyfriend of the owner’s wife “It is almost impossible to cut the metal with any other tool” – I don’t know where this guy comes from! Maybe he won a competition among DIY-rs on that website, or maybe he just a boyfriend of the owner’s wife , but he definitely doesn’t know what he is talking about. , but he definitely doesn’t know what he is talking about.
6. Snap the duct together. It has a special snap lock built in at the factory.
Well, sometimes it’s very easy to do, but sometimes it’s not, especially when you cut a piece of duct!
But why he doesn't explain how to snap the duct together?
Safety Tip: Wear gloves and eye protection when working with sheet metal.
It’s funny but he comes up with this safety tip only at the sixth step, maybe he just lost an eye or cut his finger off?  Just curious! Just curious!
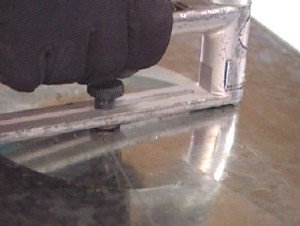
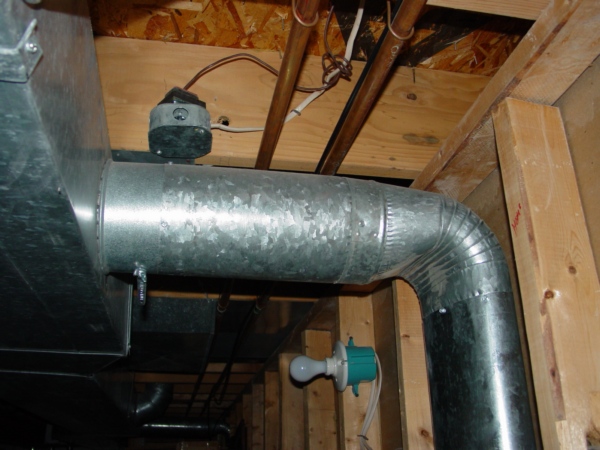
 7. Install the damper into the duct by drilling a hole into the side of the duct and then screw the damper in place. The damper control indicator will show you whether the damper is open or closed (figure I). 7. Install the damper into the duct by drilling a hole into the side of the duct and then screw the damper in place. The damper control indicator will show you whether the damper is open or closed (figure I).
The damper installation requires following of the special rules, otherwise it will make a lot of noise! But never mind listen to the expert! And look in the picture: this “expert” was in such hurry to post this on a page of that website he even forgot to make the second hole in the duct. But maybe it’s his first project? Just curious.
Expert Tip: Dampers are critical for the efficiency of a forced air system. They allow you to adjust the amount of air flowing into each room balancing the system.
8. Put the crimped end in first, and then put the other end of the duct in. The takeoff rotates to make it easier to fit the duct into place.
“Put the other end of the duct in” – in what? The other end of this duct must be put on, but not in, but for the experts like this it’s very, very insignificant! And what will he do if the take-off won't rotate?
Tip: Make sure the damper control is on the bottom of the duct.
9. Secure both ends with a few 1/2" sheet metal screws through the collar.
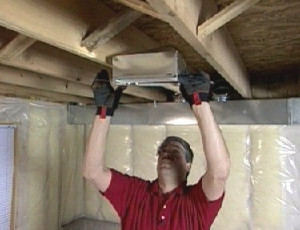
 10. Add a couple of support brackets (figure J) to help support the weight of the duct. 10. Add a couple of support brackets (figure J) to help support the weight of the duct.
11. Finally, attach the register to make it look a little nicer.
 So after reading all of this I've got a question: Why is he doing that? If anyone can tell me why on this page I would really appreciate your opinion! So after reading all of this I've got a question: Why is he doing that? If anyone can tell me why on this page I would really appreciate your opinion!
Ed
|
|
How to Extend a Heat Duct to the Floor
This page gives a description on the installation of the heat duct in the wall, which separates the mechanical room from the rest of the finished basement. On this page you can see pictures of all necessary tools and materials and pictures of the system elements installed. There are 16 pictures on this page. All installation is divided into four steps which represent the entire project in the making. Price $2.50.
Installation on the paid page might not exactly describe your upcoming project. However, it will give you an important example of how this type of installation should be done. In addition, it will open the gates for as many questions as necessary to make sure that the job is done right. |
|
Tap Takeoff into the Existing Duct
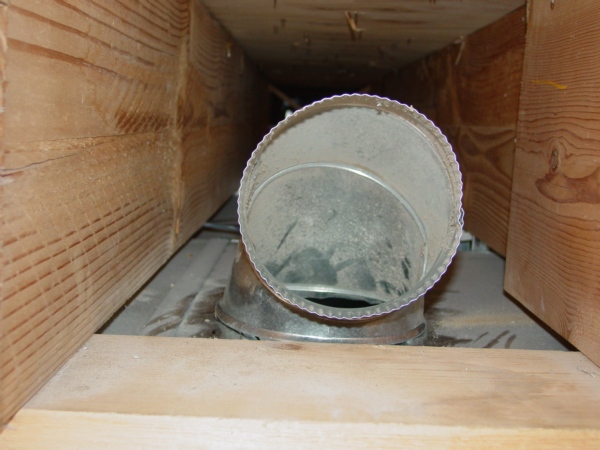 Hello Ed, Hello Ed,I am installing a partition wall between the mechanical room and the semi-finished part of the basement. The semi-finished part has carpet, painted walls. But, I do not intend to install ceiling.
I want to tap into the existing duct work for air-conditioning / heating.
Since there will not be any ceiling, I could just use a round pipe and elbow to blow the incoming air from the top. For the return I need to install something in the wall yet to be built. I am not familiar with all of different types of ducting parts and tools. Therefore, I was hoping that your website could be useful.
Any help will be appreciated, even if it costs.
Thanks
If you got a similar question please click the "Buy Now" button below and get the answer.
Installation on the paid page might not exactly describe your upcoming project. However, it will give you an important example of how this type of installation should be done. In addition, it will open the gates for as many questions as necessary to make sure that the job is done right.
|
|
|
A website "ductworkinstallation. com" focus on providing information and services related to the installation of ductwork systems , which are the tubes used to distribute heated or cooled air throughout a building as part of an HVAC system; essentially, it would be a platform for individuals or companies specializing in designing and installing ductwork for homes and commercial properties, offering details on the process, and potential contractors to contact for such services.
Key points about ductwork installation websites:
Services offered:
New ductwork installation, ductwork repair, duct cleaning, duct sealing, airflow balancing.
Target audience:
Homeowners looking to install a new HVAC system, individuals experiencing issues with their existing ductwork, commercial property owners needing ductwork for large buildings.
Information provided:
Explanations on different types of duct materials, design considerations for optimal airflow, potential benefits of proper ductwork installation.
|
|