|
|
| How to Use 90 and 45 Degree Elbows and Offsets |
|
It would be pretty boring if all our customers have rectangular shaped basements and straight ducts would be hanging from one end to another. Fortunately for us there are plenty of nonstandard basements and ducts could be run with all kinds of fittings.
This page is the second one of pages dedicated to different kinds of fittings that are usually used to change ductwork direction and has three types of them on it: flat 90 degree elbows, flat 45 degree elbows and offsets.
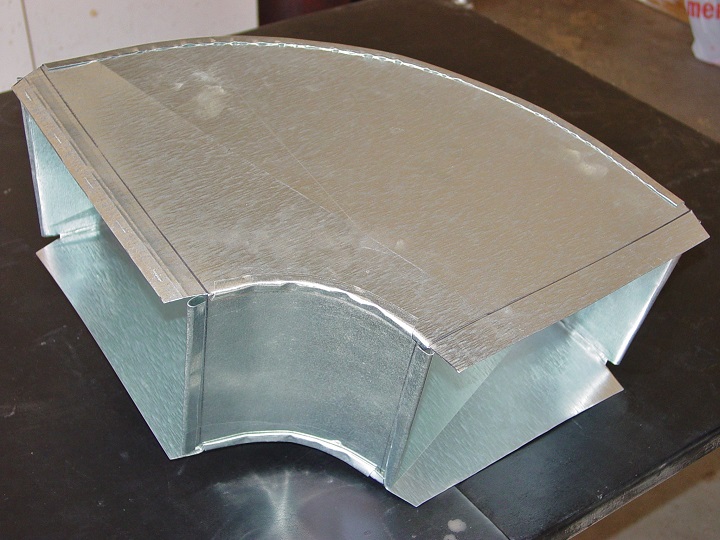
Let's start by learning on how to use flat 90 degree elbows:
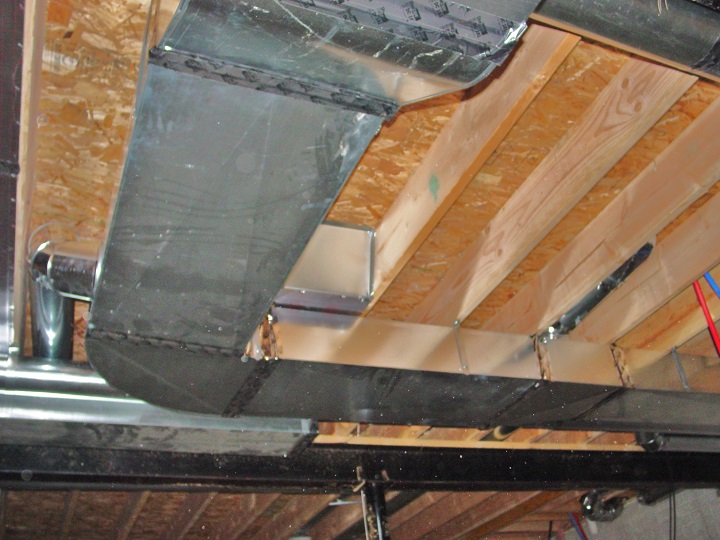 
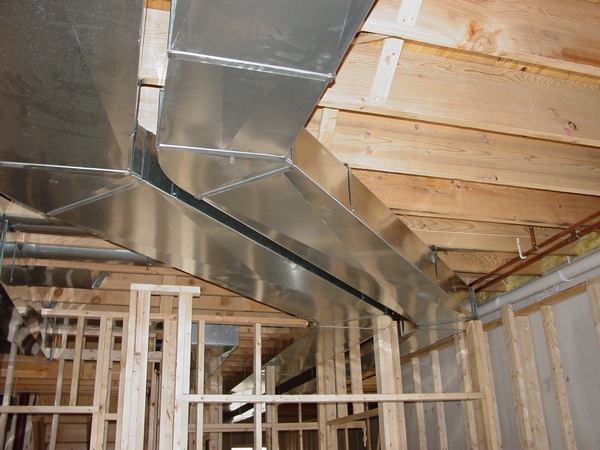
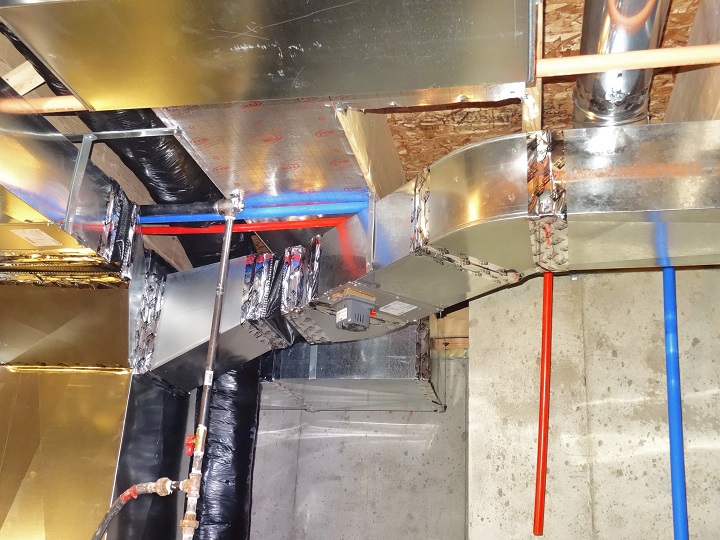
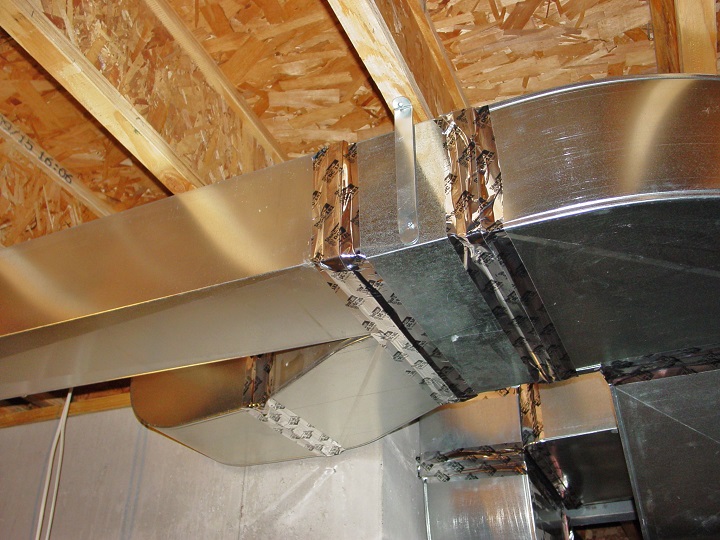
Flat 90 degree elbows are usually used to change direction in front of the obstacle such as I-beam or basement wall or if a duct is changing direction after it passed an obstacle.
Sometimes they are used as offsets in cases if there is no room for more conventional 45 degree offsets.
 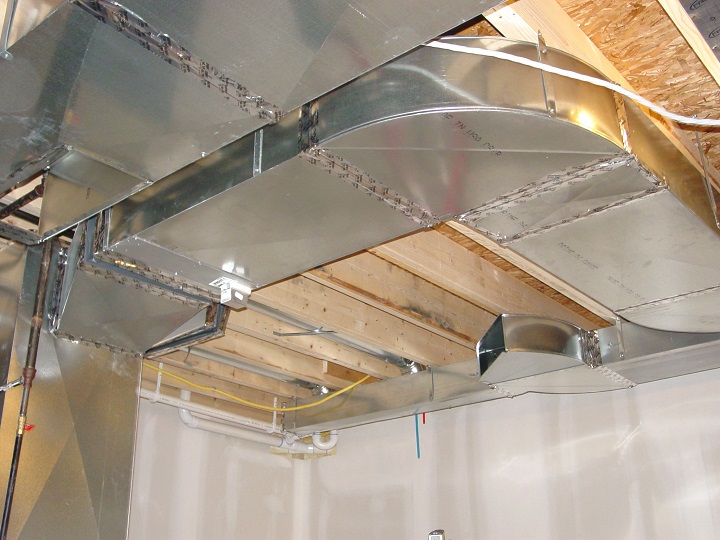
If for some reason you have to run a duct from the opposite side it's not too difficult to get a flat 90 degree elbow installed.
 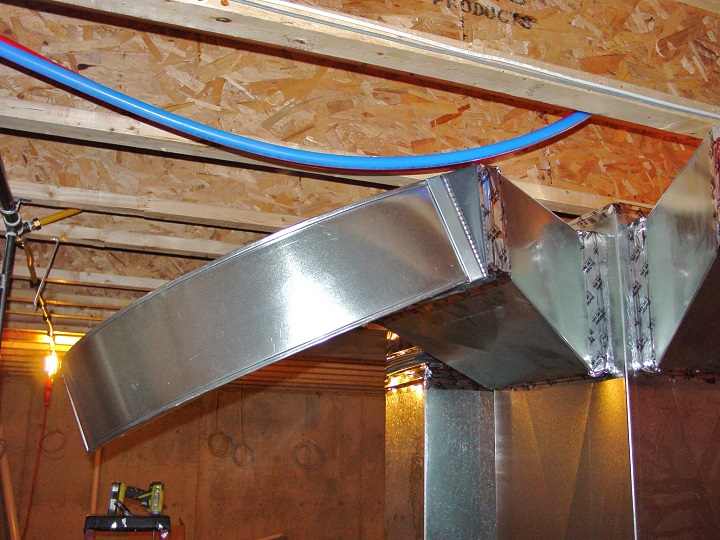
In the picture above a flat 90 degree elbow is used for a connection to the supply duct in the underground system.
While measuring the distance between two flat 90 degree elbows or an elbow and a duct you just have to hook up a tape measure to the drive, stretch it out and get a measurement.
If you are using a flat 90 degree elbow right after a canvas, don't even try to hang it right away - connect it to the following duct first.
If you are running a small HVAC business and don't want to spend a lot of money on very expensive equipment or if you need to make any fitting right on the job-site. On this page below and on the following pages you can purchase quite a few tutorials on how to make those fitting using only the hand-tools.
Instant Access:
Register on the site first (recommended), otherwise after you have purchased a paid page; PayPal is going to bring you back to my website. In order to see the paid page you have to click on the “Register” button, fill out the form, choose your own Username and Password and click on the “Register” button at the bottom of the form – congratulation, you are now on the page you have paid for!
Important: After you have purchased any Paid page or Download page and PayPal brought you back to my website, the first thing that you should do is to save that page to your Favorites. Then if something goes wrong you always can come back to re-register yourself on my website again.
|
|
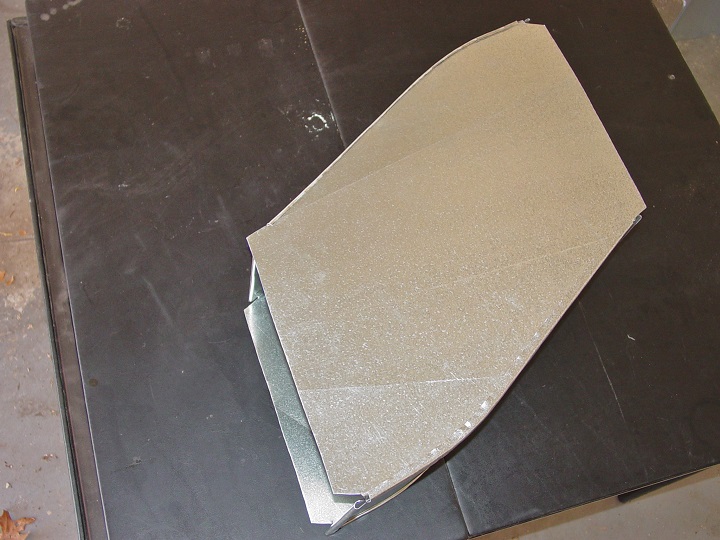
How to Make 90* Square Throat Elbow with Hand Tools
 Nobody in the big operations companies making any radius fittings anymore! All the fittings such as elbows, offsets, risers, cold air boots and so on made with the square throats. This way it's a bit easier and faster to produce and assemble and in this tutorial for the price of only $2.50 you will learn how to do it. On the page you'll see 35 high quality pictures set in the step-by-step sequence with explanations. Nobody in the big operations companies making any radius fittings anymore! All the fittings such as elbows, offsets, risers, cold air boots and so on made with the square throats. This way it's a bit easier and faster to produce and assemble and in this tutorial for the price of only $2.50 you will learn how to do it. On the page you'll see 35 high quality pictures set in the step-by-step sequence with explanations.
|
|
How to Make Radius Elbow with Hand Tools
 If you would search the web for the tutorial in the title above you may find this video file: If you would search the web for the tutorial in the title above you may find this video file:
https://www.youtube.com/watch?v=kzLQotVEsKQ
This is a relatively good video, with only a couple of flows: the second part of this video doesn't exist and it's not clear what type of audience the author is targeting.
If you are working as a sheet metal worker at any shop in the USA the experienced guys would teach you how to make all the parts, run the Pittsburg seam through the machine and put all the parts together in a heart beat! But if you are a somebody else this video is pretty much useless because you most likely don't have a Lock Former Machine...
So, in my tutorial for the price of only $2.50 you will learn how to make all four parts of the radius elbow; how to make the Pittsburg seam and how to put this elbow together. This guide also includes the video that is mentioned above that you can visualize at least part of the process and 37 high quality pictures.
|
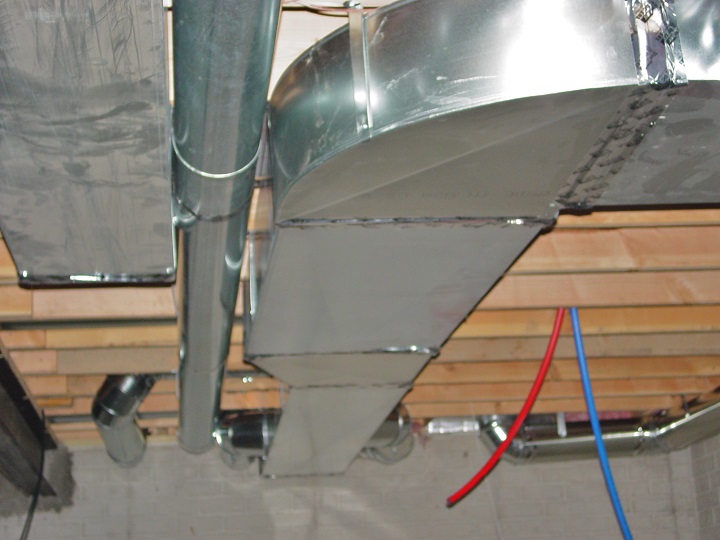
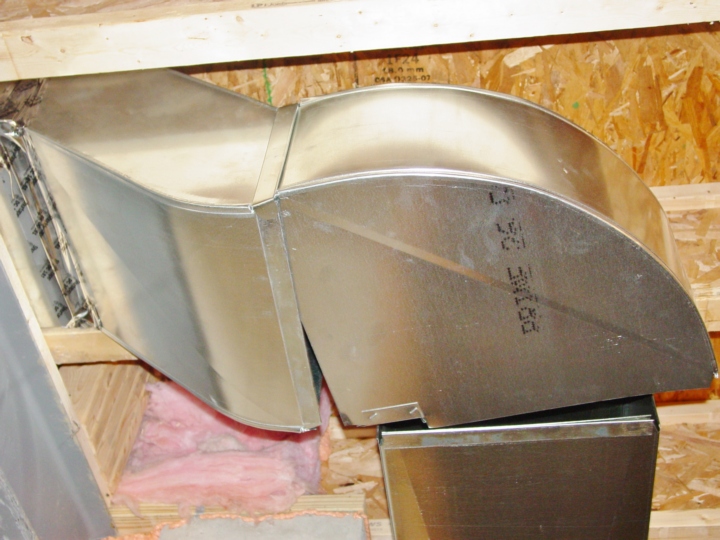
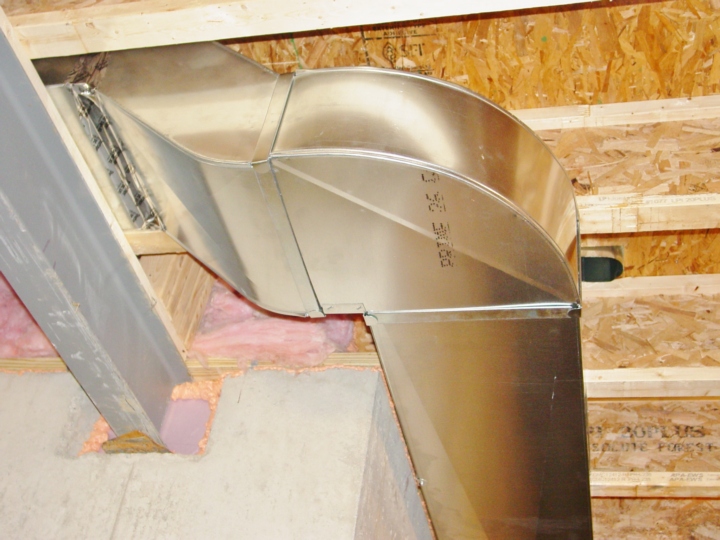
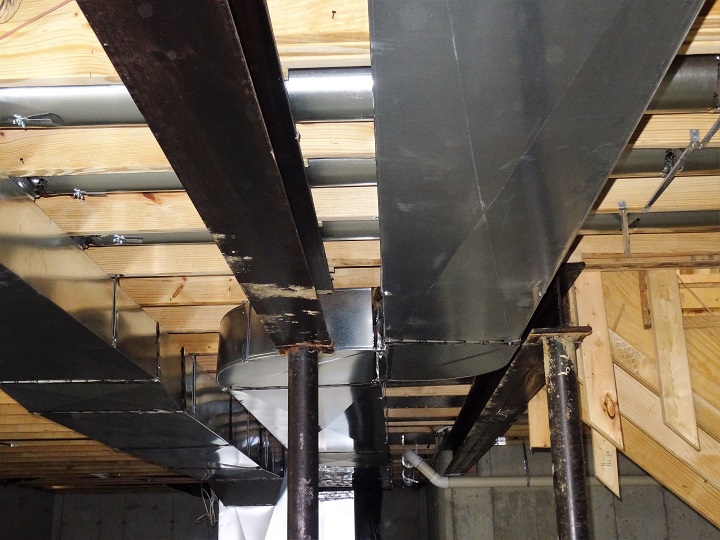
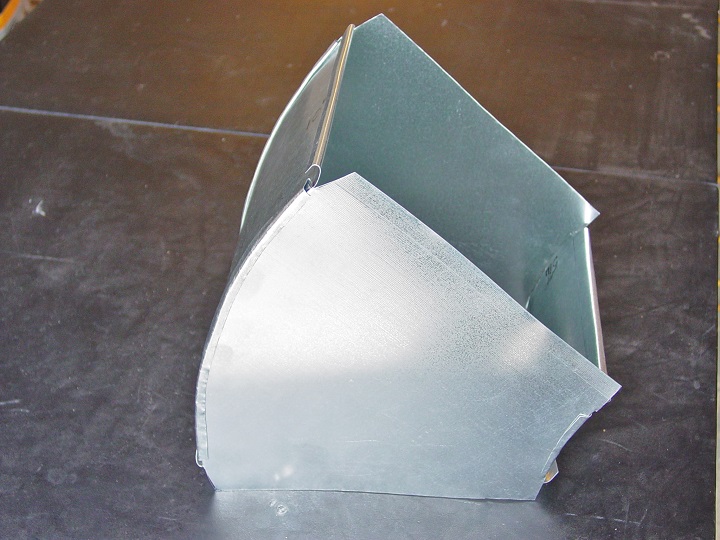
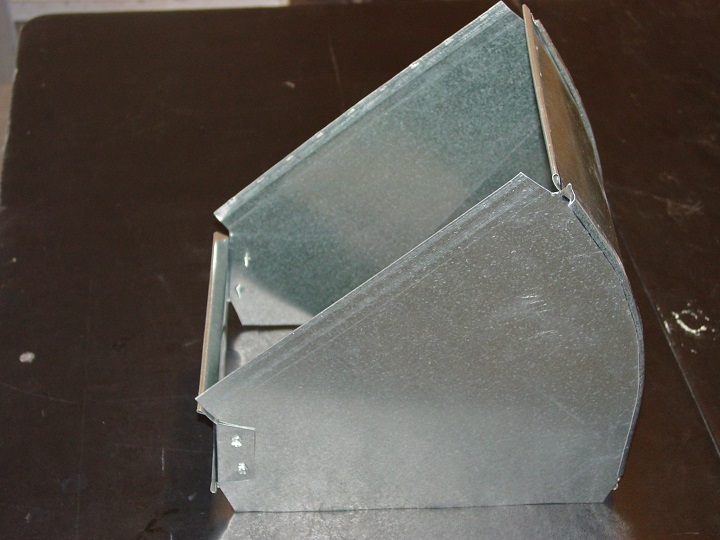
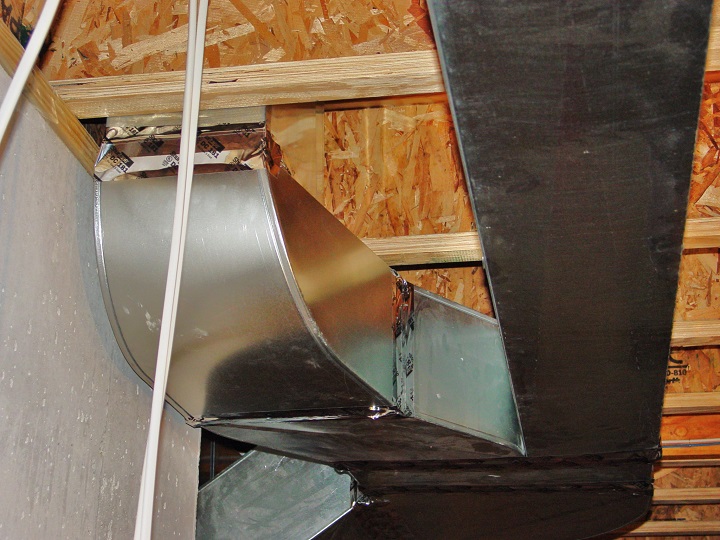
| Flat 45 degree elbows used mostly to offset any kind of obstacle. The distance between them could be tricky to find and require use of a special technique and formula. The formula itself is very simple, but without proper knowledge it's pretty much useless. Online you may find multiple websites that would provide the formula and explanations on how to calculate by using a centerline, but what is looks very good on your computer's monitor very difficult to replicate on the field.
If you would like to learn this formula and what is most important the way how to use it on your job-site click on the Buy Now button below.
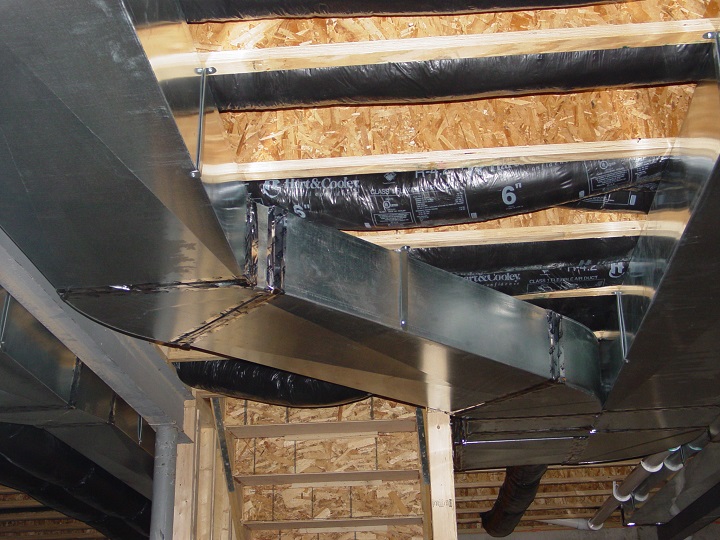 
Flat 45 degree elbows in the pictures above were used to connect the furnace to the duct in the chase.
The distance between two flat 45 degree elbows can be very short or, sometimes, can be longer than the length of the whole duct - eight feet.
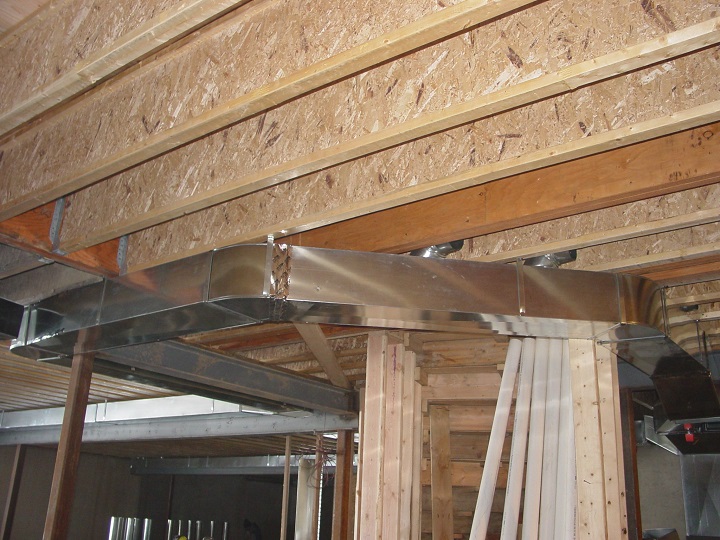
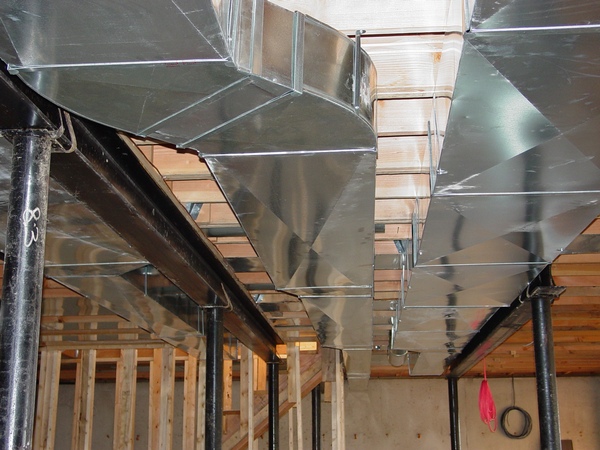
Sometimes flat 45 degree elbows could be used to wrap a certain area around. The way of calculating the duct length in this case you can purchase below.
The walls in this basement were set at 75 degree to each-other, it's why flat 45 degree elbows in this case were impossible to use. However I found the way how to transform them into 75 degree elbows. If you would like to find out how it was done you can submit your request on this page.
|
|
How to Make 45* Radius Elbow with Hand Tools
 On this page for the price of only $2.50 you can learn how to make a 10" x 8" radius elbow by using just hand tools. This tutorial has 30 high quality pictures with brief explanations. On this page for the price of only $2.50 you can learn how to make a 10" x 8" radius elbow by using just hand tools. This tutorial has 30 high quality pictures with brief explanations.
|
|
How to Make 45* Square Throat Elbow with Hand Tools
 Nobody in the big operations companies making any radius fittings anymore! All the fittings such as elbows, offsets, risers, cold air boots and so on made with square throats. This way it's a bit easier and faster to produce and assemble and in this tutorial for the price of only $2.50 you will learn how to do it. So from now on you are able not only learn how to figure out the length of the duct between to 45 degree elbows but make those elbows yourself on the job-site or at home! Nobody in the big operations companies making any radius fittings anymore! All the fittings such as elbows, offsets, risers, cold air boots and so on made with square throats. This way it's a bit easier and faster to produce and assemble and in this tutorial for the price of only $2.50 you will learn how to do it. So from now on you are able not only learn how to figure out the length of the duct between to 45 degree elbows but make those elbows yourself on the job-site or at home!
On the page you'll see 37 high quality pictures set in the step-by-step sequence with explanations.
|
|
Length of Duct Between Two Flat or Virtical 45* (30*; 60*) Working as Offset/Riser.
 In this tutorial for the price of only $1.86 you will learn how to use formulas without using a center line method. In this tutorial for the price of only $1.86 you will learn how to use formulas without using a center line method.
|
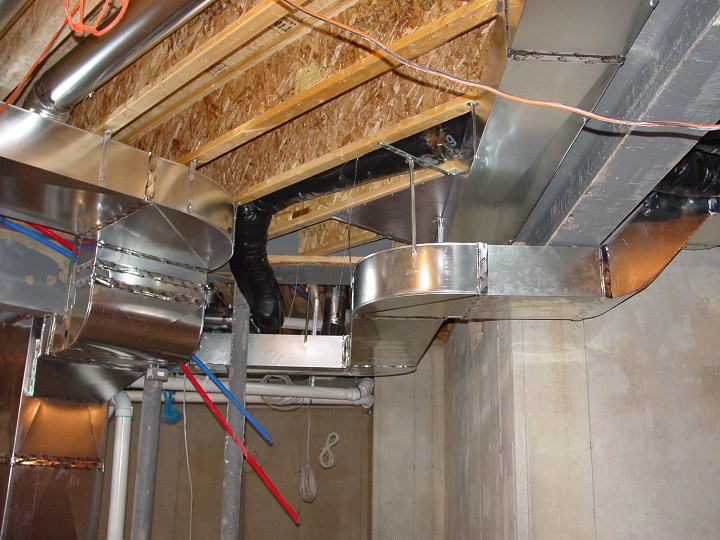
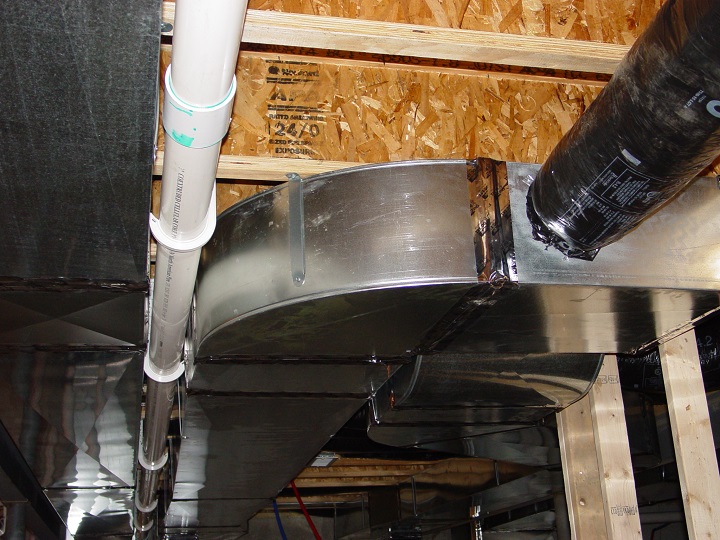
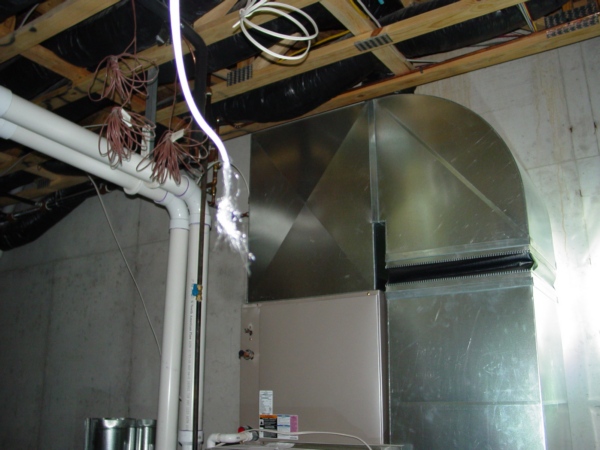
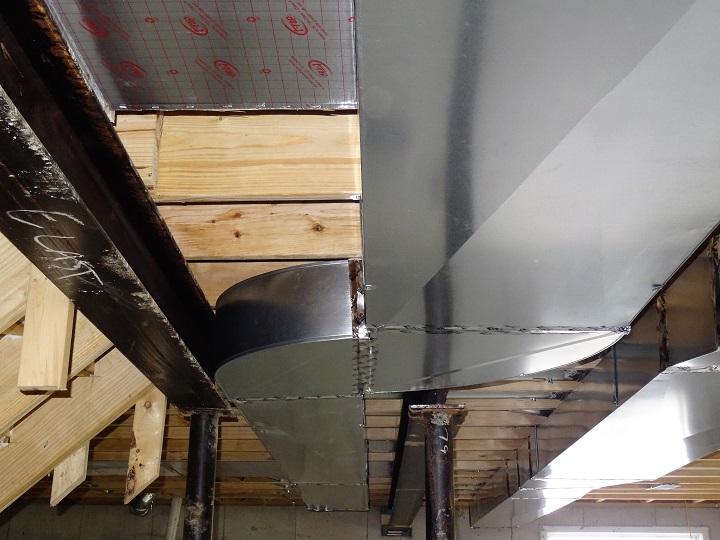
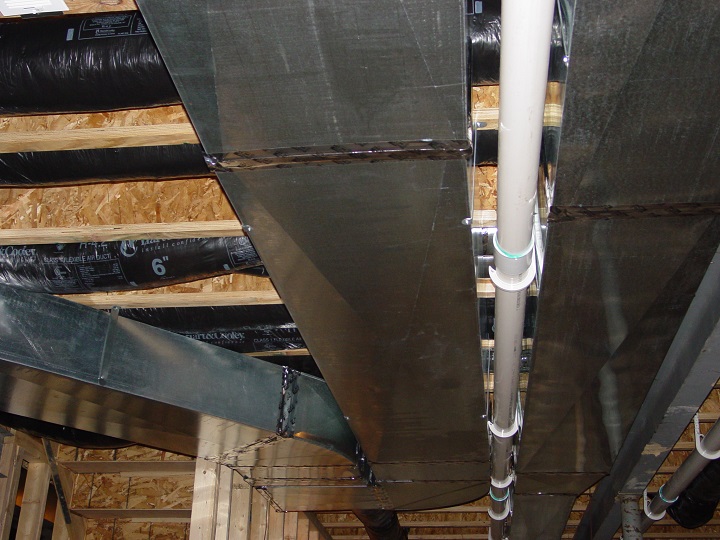
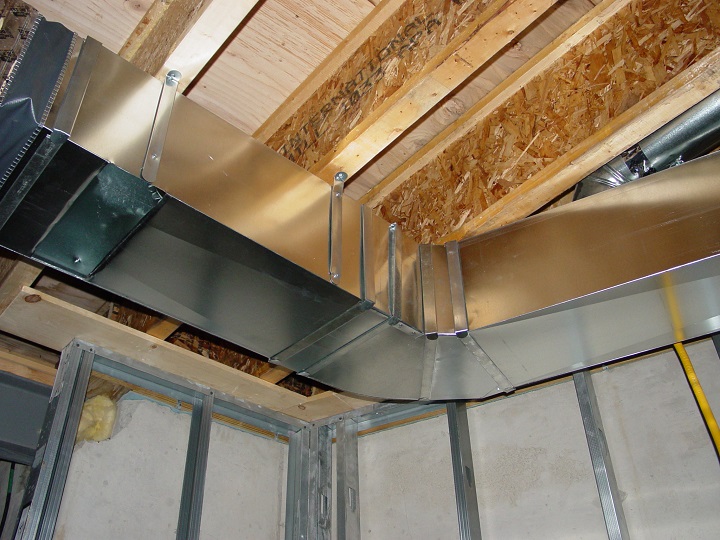
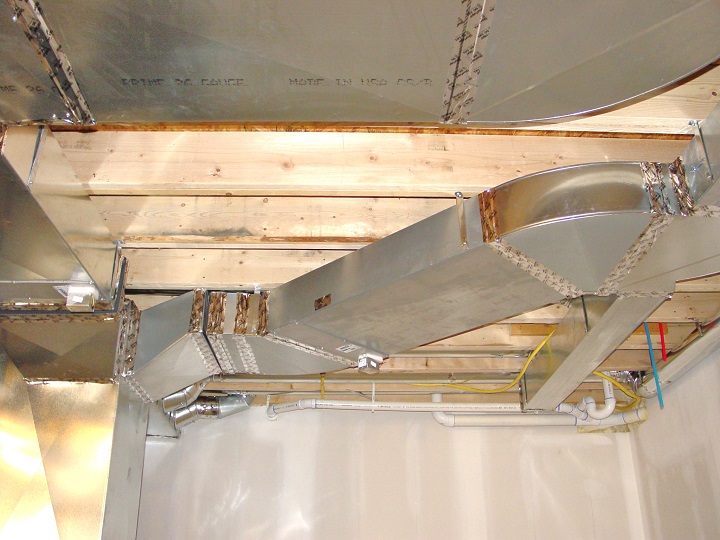
| Offsets are rarely used for basement ductwork installations, because they are just slightly move duct's centerline one way or the other. For anything large than that you should use flat 45 degree or 90 degree elbows.
In the pictures above you can see 6" offset for 12" x 8" duct that was used to connect a 20" x 8" duct to a Hess fitting.
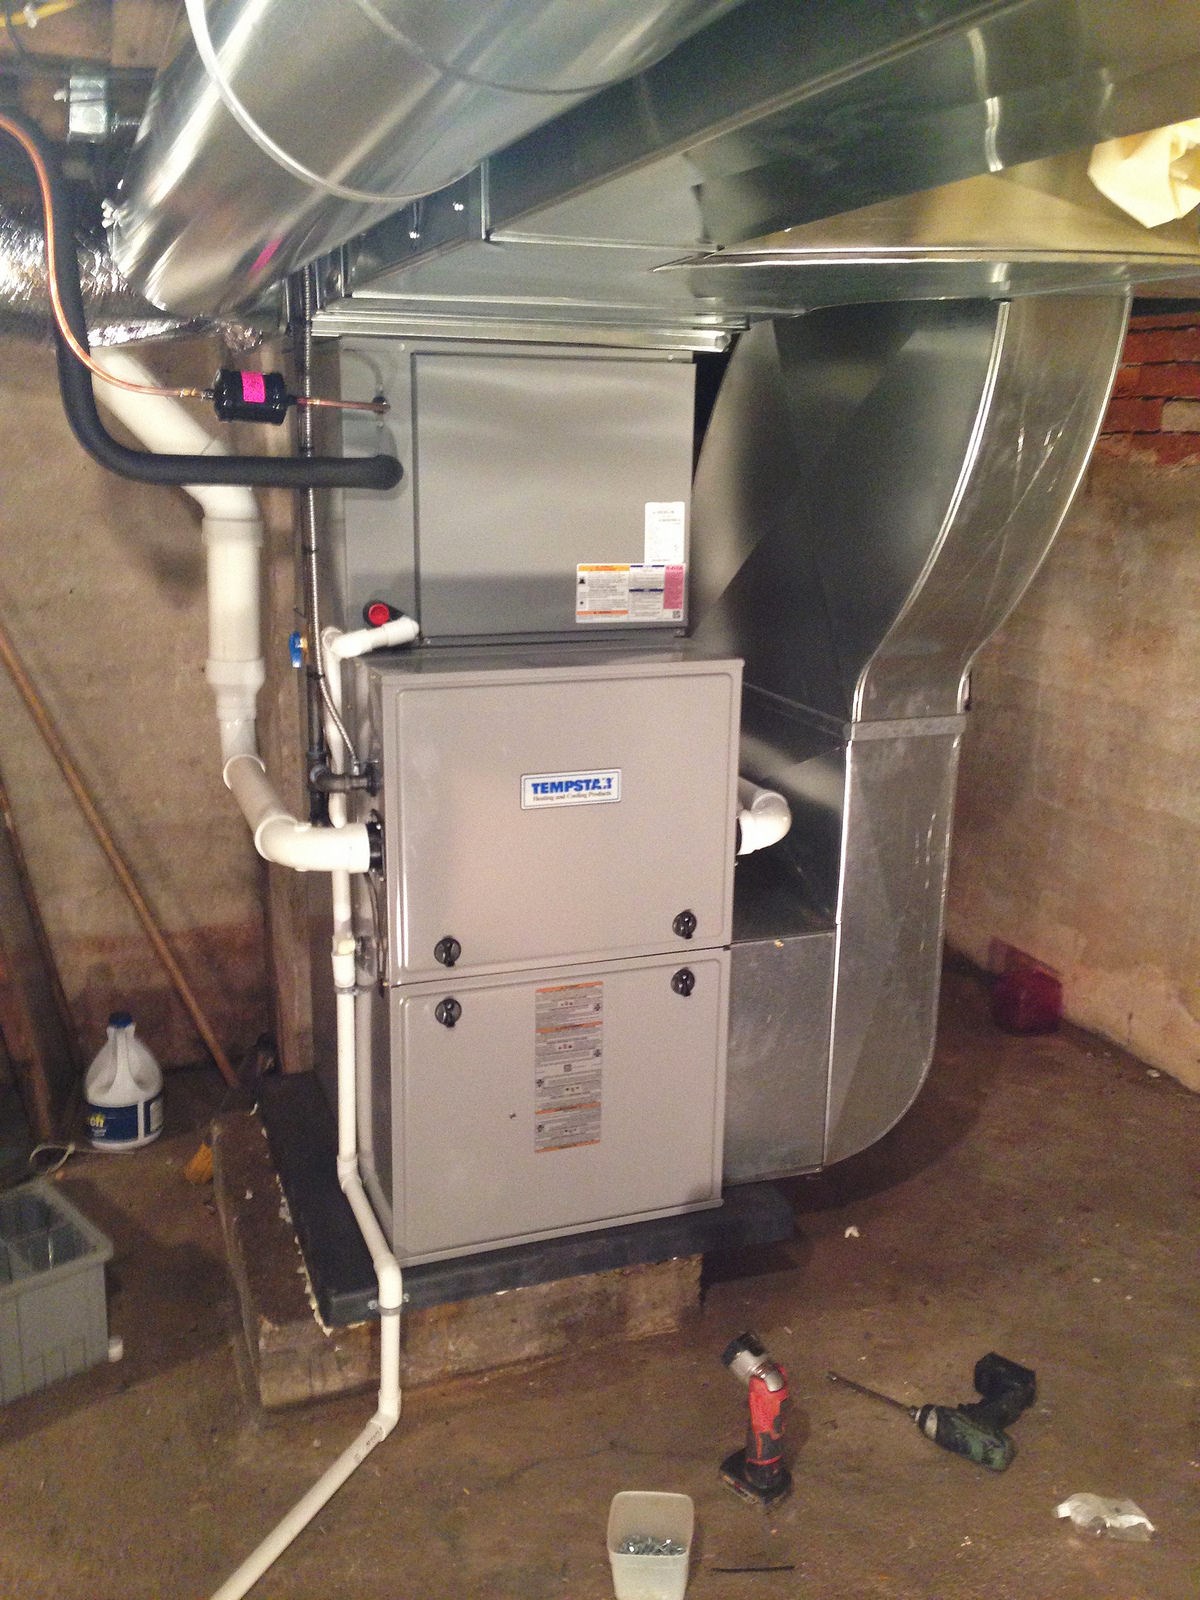
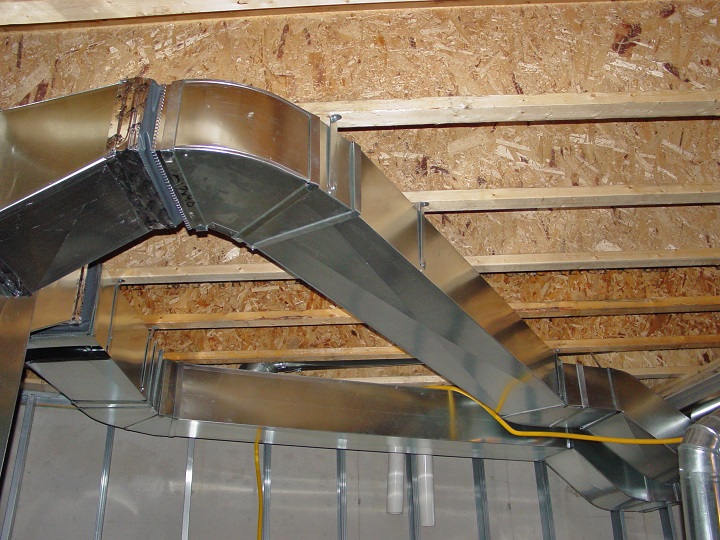
A 24" x 8" offset in this case was used to reconnect a new furnace to the old ductwork. However a guy who made this fitting didn't know how to make a rolling offset, it's why this furnace helplessly sits on the edge of the platform. Does it looks like shit, doesn't it?
If you would like to learn how to make an offset using only hand-tools click on one of the Buy Now buttons below and please don't miss the rolling offset - it would be definitely helpful at the installation above.
|
|
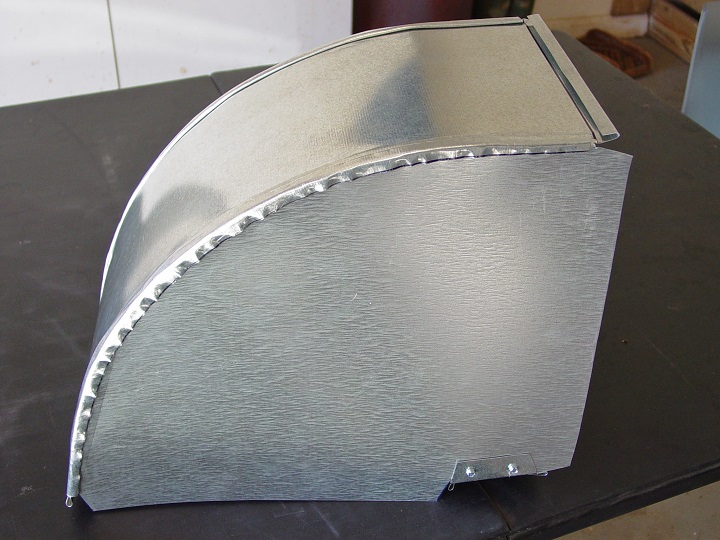
How to Make Radius Offset with Hand Tools
 If you compare this radius offset (on the left) to square throat offset below there is not much difference. However it looks better and it has lower resistance to the airflow. Of course it's a bit more complicated to make - it might take extra 10 minutes or so to draw an outline, make and put all parts together, but it worth the effort. If you compare this radius offset (on the left) to square throat offset below there is not much difference. However it looks better and it has lower resistance to the airflow. Of course it's a bit more complicated to make - it might take extra 10 minutes or so to draw an outline, make and put all parts together, but it worth the effort.
So, if you would like to learn how to make this kind of an offset with hand-tools only, please hit the Buy Now button below. Then, for the price of only $2.50 you will gain an instant access to the unique page with 39 high quality photos on it set in the step-by-step sequence with brief explanations.
|
|
How to Make Square Throat Offset with Hand Tools
 OK, it's not too difficult to figure out how to make this kind of offset! But how would you make the Pittsburgh seam, both parts of it - the female and male parts without machine??? Well, if you are looking for the answer to this question, for the price of only $2.50 you can find it out by purchasing an instant access to the page that has it all! OK, it's not too difficult to figure out how to make this kind of offset! But how would you make the Pittsburgh seam, both parts of it - the female and male parts without machine??? Well, if you are looking for the answer to this question, for the price of only $2.50 you can find it out by purchasing an instant access to the page that has it all! |
|
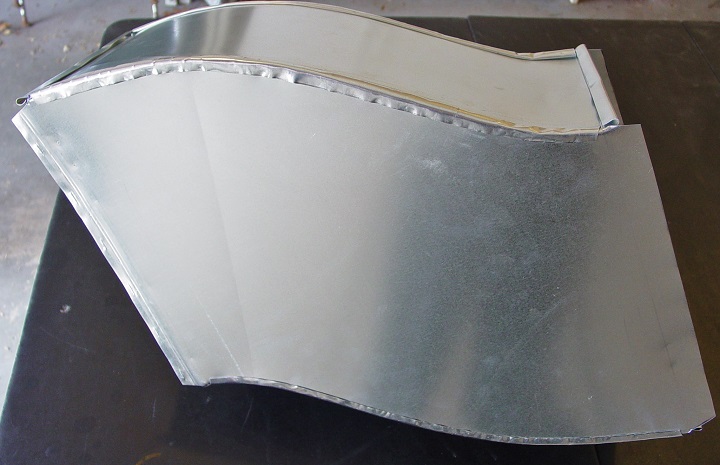
How to Make Offset and Riser in One Piece
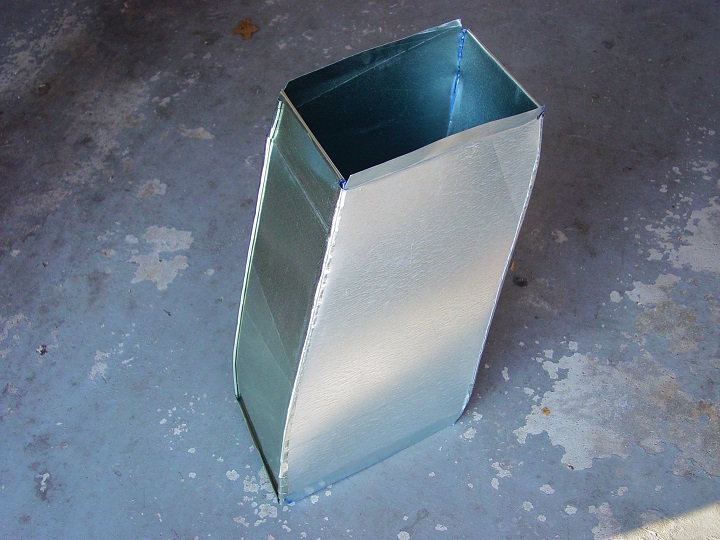 I already have this kind of tutorial for a piece of duct. You can find it on the paid page above. But if you need a real thing something like shop-made offset or riser you might be interested in this tutorial. I already have this kind of tutorial for a piece of duct. You can find it on the paid page above. But if you need a real thing something like shop-made offset or riser you might be interested in this tutorial.
The fitting that you see on the left is 12" x 8" "rolling" offset, and it changes direction horizontally for 6" (offset) and vertically for 5" (riser), and it's 18" in length. You can't find online a tutorial for these kind of fittings - because I already tried and there is nothing for the ducts (just for the pipes), and they won't teach you at the sheet metal shop - because you can't use a Pittsburg lock machine for this fitting's Pittsburg seam! That's why these kind of fittings you can make only with the hand tools.
The price for this tutorial is only $3.50. On the page you'll see 36 high quality pictures set in the step-by-step sequence with explanations.
|
|
Totally Hand Made Duct Fittings
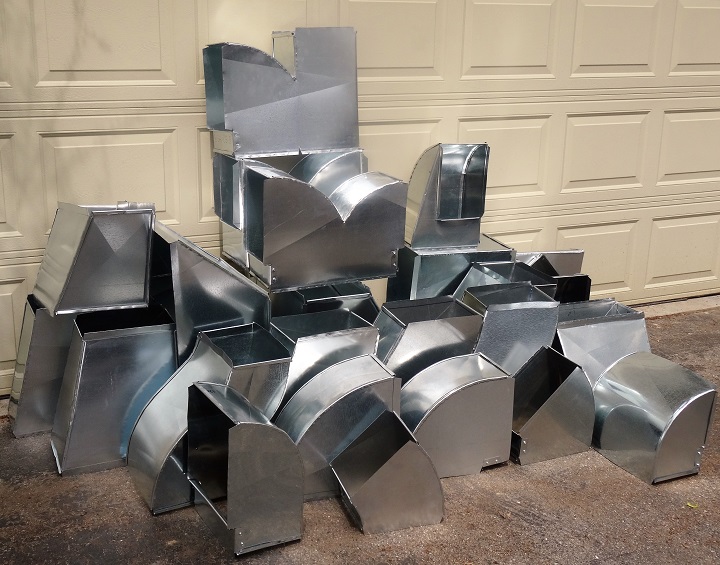 Not too long ago I, like many of you, sincerely thought that the way of making any kinds of sheet metal fittings is only possible by using sheet metal brake and metal forming machines! Not anymore: Not too long ago I, like many of you, sincerely thought that the way of making any kinds of sheet metal fittings is only possible by using sheet metal brake and metal forming machines! Not anymore:
From late Fall and Winter of 2015 through May 2016 I made more than twenty most frequently-used sheet metal fittings without using any of these very expensive machines.
All the fitting that you see in the picture on the left I made with hand-tools only!
The price of all 35 tutorials below, if you would buy them separately is $90.00, however if you would like to purchase an instant access to all of them at the same time you can do it for a low price of only $29.99!
List of Tutorials:
- How to Make Cone Reducer
- How to Make Square to Round Offset Transition
- How to Make Round to Square Transition
- How to Make 45* Roof Penetration
- How to Make Radius Elbow
- How to Make 45* Radius Elbow
- How to Make Radius Offset
- Now to Make Radius Riser
- How to Make Offset and Riser in One Piece
- How to Make 90* Square Throat Elbow
- How to Make 45* Square Throat Elbow
- How to Make Vertical Elbow
- How to Make Square to Rectangular Vertical Elbow
- How to Make Square Throat Offset
- How to Make Square Throat Riser
- How to Make Square Throat Tee
- How to Make Transition Tee
- How to Make Y- Branch Fitting
- How to Make Riser Starting Transition
- How to Make Flat on Top & Side Starting Transition
- How to Make Centralized Hess Fitting
- How to Make Flat on One Side Hess Fitting
- How to Make 45* Hess Fitting
- How to Make Flat Duct Reducer
- How to Make Vertical Duct Reducer
- How to Make Flat & Vertical Duct Reducer
- How to Make Transition from Your New Furnace to Old Plenum
- How to Make 20 x 20 to 30 x 25, One Inch Offset Transition
- How to Make 24 x 10 to 10 x 24 Duct Transition
- How to Make Transition from Duct with Hand Tools
- How to Make Flat Offset Transition from Duct
- How to Make Transition from Whole Duct
- How to Make Turning Veins
- How to Make Wye with Hand Tools
- How to Make Round End Cap with Hand Tool
|
|
|
A website "ductworkinstallation. com" focus on providing information and services related to the installation of ductwork systems , which are the tubes used to distribute heated or cooled air throughout a building as part of an HVAC system; essentially, it would be a platform for individuals or companies specializing in designing and installing ductwork for homes and commercial properties, offering details on the process, and potential contractors to contact for such services.
Key points about ductwork installation websites:
Services offered:
New ductwork installation, ductwork repair, duct cleaning, duct sealing, airflow balancing.
Target audience:
Homeowners looking to install a new HVAC system, individuals experiencing issues with their existing ductwork, commercial property owners needing ductwork for large buildings.
Information provided:
Explanations on different types of duct materials, design considerations for optimal airflow, potential benefits of proper ductwork installation.
|
|